Search this blog

Translate

Thursday, December 31, 2015

Pomegranate & Ginger Flan Patissier

It was my turn to host NYE this year.  I had a spectacular feast of wasabi lump eggs, oysters on the half shell, shrimp, homemade egg rolls, crocodile steak in green coconut curry, and lovely French cheeses.  It was a fusion of cultures within each course.. a perfect representation of this year.  To top it off, I wanted something beautiful.. and no.. no Buche.  I'm not a buche type of girl.
After researching a bit on different traditions, I found that it brings good fortune to eat round things on NYE and New Year's Day.  In the dessert section, it is often round cakes.  Pie is round.. right?  I am a pie type of girl.. but what?
I finally settled on something simple.. a Parisian Flan.  Alone, it is an everyday type of dessert.. but I decided to lace it up in a ruby crusted corset to make it sexy enough for the occasion.
Round fruits are also signs of good fortune.. and pomegranate fits right into that category.  Plus, it makes me think of precious rubies scattered all over my plate.
I also learned that eating pomegranate seeds promotes fertility.. hmm... interesting.
One never knows what the year to come has in store for us.  I never in my life would have imagined living the events that happened in this past year.
Life is Beautiful
Serves 8-10
Ingredients
shortcrust:
100g (3.5oz) butter, cubed
100g (3.5oz) buckwheat flour
125g (4.4oz) flour
pinch salt
1 Tbsp nutritional yeast
1 packet vanilla sugar
2 Tbsp cane sugar
1 tsp ginger powder
1/2 tsp cinnamon
1 egg yolk
5 cL (approx 2 floz) water
Use the method, then pre-bake for 10 minutes at 190°C

Filling:
75cL milk
20 cL cream
70g (2.5oz) cornstarch
4 egg yolks + 1 whole egg
90g (3.2oz) cane sugar
2 tsp freshly grated ginger
1/4 tsp salt
1 tsp vanilla extract
30g (1.1oz) butter butter
seeds from 1 pomegranate
handful chopped candied ginger

Topping:
seeds from 1 pomegranate
drizzle of pomegranate molasses

Directions
1.  In a mixing bowl, whisk part of the milk with the cornstarch until evenly dissolved, then beat the rest of the milk, eggs, sugar, fresh ginger, and salt until even without lumps.
2.  Pour the mixture into a pot and heat on medium high on the stovetop.  Whisk continually and the mixture will thicken.
3.  Remove from heat and whisk in the butter, pomegranate seeds, vanilla, and candied ginger.
4.  Pour the mixture into the pre-backed shortcrust and bake for 40 minutes at 180°C 350°F.
5.  Let cool!  This step is important.  You want it to be chilled or at room temperature.  The chilling can be done in the fridge.
To serve, cut a slice and spoon some fresh pomegranate seeds onto it.  I love the look of fresh pomegranate seeds.. it's studded with rubies!
Then to make it extra fancy, drizzle some of that sexy pomegranate molasses onto the plate.
My artistic father would be proud of this creation.

The result is a mixture of textures and tastes.. sweet, sour, crunchy, nutty, spicy.  It is the perfect jewel for a perfect end to the most incredible year I've lived since being in France.
Happy New Year to all!

Print Friendly and PDF

Tuesday, December 29, 2015

Chipotle Barbacoa Beef

As much as I love living and eating in France, there is seriously a lack of Mexicans and Tex-Mex items.  Please, Mexicans.. COME TO FRANCE!!  You will feel exotic and unique here!
I can easily find Indian, Chinese, Korean, and Thai products, but simple things like dried chiles and hominy are literally non existant with an exception once every 5 years.
Yes, you can find fresh chiles, but they are usually the red Thai or the green Moroccan.  No Jalapeños in sight.  When it comes to dried, you can find the spicy oiseau or cayenne ones, and in specialty stores you can find the red Indian ones.. but nowhere in site are chile de arboles, guajillo, moritas, puyas, pasilla, ancho.. or any of the other magnificent Mexican nectar.
For those who know me and travel, my "bring me this" list is always dried chiles and chipotles from a can... (and mango chile lollipops and Tapatio sauce).
Always.
So when I get my hands on some tortillas, I often dream about barbacoa beef.. but I had never really thought it was a possibility here.
Behold my very last can of chipotle chiles (family and friends.. this is a sign).. I have dedicated it to making my ultimate favorite fast/slow food burrito.. the Chipotle Barbacoa Beef burrito.
Just typing those words is making me salivate.
In college, I think I ate one of these at least once a week!
Serves 12 extra large burritos
Ingredients
1 kg (2 lbs) stew beef or chuck roast
1/6 cup apple cider vinegar
4 cloves garlic
2 tsp cumin seeds
2 tsp oregano
1 tsp whole black pepper
1/2 tsp salt
1/4 tsp ground cloves
juice from 1 lime
4 chipotle chiles in adobo sauce (from a can)
3/8 cup vegetable broth
2 bay leaves
Directions
1.  Place the garlic, cumin, oregano, black pepper, cloves, salt, and chipotle chiles with sauce in a blender and mix into a smooth puree.
2.  Put the beef in your slow cooker and cover with the puree adding the broth, bay leaves, and lemon juice on top.
3.  Cook on low for 6-8 hours.  I did this overnight.. I had some really hot Chipotle dreams that night.
4.  Using 2 forks, separate the meat into shreds and let it sit for a little while to let let shreds absorb the juice.  I transferred to a baking dish and covered with foil to free my crockpot for black beans.
5.  Now your meat is ready.  If it has cooled down too much, it can be re-heated in the oven, covered, of course!
You can use this for a bowl, on corn tortillas as tacos, or in burritos.
(There are no real corn tortillas in France)

Here's what went into my big fat Chipotle burritos!
With all the fixings.. sautéed bells and onions, black beans, rice, pico de gallo salsa with corn, sour cream, shredded cabbage, avocado, shredded swiss.. mmmmm!
Then I rolled it and wrapped it up Chipotle style for practical eating purposes...
.. and topped each bite with a lovely squirt of lime..

Just heavenly spicy deliciousness.
These are the kind of cravings that make you orgasmic when you obtain them... especially when you realize you made it 10x better than the original version!

The upside?  I ate this for 3 days in a row.. and I froze half the meat for future cravings.
Oooh!

Print Friendly and PDF

Monday, December 28, 2015

Three-Ginger Pecan Pie

Pecan pie has been on my mind for a few years now.  I have some old Thanksgiving memories of a tooth-achingly sweet but absolutely fabulous pie with pecans forming a top crust and a gelatinous custard underneath I could never figure out.  Coming from the desert, I would joke that it was cockroach pie because the intact pecans reminded me of the local Palmetto roaches that like to hang out in the swamp coolers.  I know.. this is not a very appetizing intro.. but I used to refuse to eat dates as well for the same reason.  Once I got past that little though, bliss became me.
The only reason I hadn't made pecan pie until now is that almost every single recipe called for corn syrup and cornstarch.
I know it's psychological, but I cannot knowingly put corn syrup into one of my desserts.  Plus, I can't handle very very sweet desserts.. at least not as much as I could when I was younger.  It actually horrified me when I found out what that jiggly sweet stuff was under the pecan crust.
So, I completely stopped looking for pecan pie recipes.
It's funny because it's when you stop actively looking for love that it hits you in the face.  A recipe literally called out to me with the magic word: Ginger.
It has 3 types of ginger; fresh, powdered, and candied, maple syrup instead of corn syrup, and no corn starch.  Plus, I could cut out all the refined sugar if I wanted because it wouldn't dramatically change the texture.
This one was a winner.. and I'm very happy I decided to go through and make myself a new pecan pie memory..
Adapted from David Lebovitz.
Serves 8
Ingredients
Shortcrust:
100g (3.5oz) butter, cubed
125g (4.4oz) buckwheat flour
125g (4.4oz) flour
pinch salt
1 Tbsp nutritional yeast
1 packet vanilla sugar
2 Tbsp cane sugar
1 tsp ginger powder
1/2 tsp cinnamon
1 egg yolk
5 cL (approx 2 floz) water
Use the method, then pre-bake for 10 minutes at 190°C

Filling:
3 Tbsp butter
juice from 1 lime
1/4 cup milk
3/4 cup maple syrup
2 tsp freshly grated ginger
1 tsp powdered ginger
1/4 tsp salt
1 1/2 tsp vanilla extract
3 eggs
225g (7.9oz) pecans, toasted and chopped
50g (1.8oz) chopped candied ginger

Directions
1.  Melt the butter in a saucepan and add the milk, maple syrup, lime, salt, fresh ginger, and powdered ginger.  Remove from heat, add the chopped pecans, and let infuse for about 10 minutes.
2.  In a mixing bowl, beat the eggs well with the vanilla extract.
3.  Add the infused mixture into the beaten eggs along with the chopped candied ginger and mix well.
4.  Pour the filling into the pre-baked shortcrust.  Bake at 350°F 180°C for about 40 minutes.
The recipe says it should jiggle.. mine didn't really jiggle, but after cooling for about 1 hour, it was very easy to cut into slices.
It was the most fabulous tasting dessert I've ever made.
It is probably better to eat it in the afternoon with tea, for after a heavy meal it is a bit hard to go through with your desire to eat 2 slices.
Ginger is really getting a hold on me this season!

Print Friendly and PDF

Sunday, December 27, 2015

Ginger Molasses Cookies

Nothing says "Holiday" like ginger and spice.  I've been putting it everywhere on everything.  It's the most addicting piece of nature out there.. and when mixed with cinnamon cloves, and nutmeg, it fills you with warmth and love.. and leaves you wanting more.
I usually just have one cookie when I make a batch and keep the rest on the counter to offer.. but I can't keep my hands off these ones...
Yield 3 dozen cookies
Ingredients
Dry:
100g (3.5oz) buckwheat flour
180g (6.3oz) whole wheat flour
1 tsp baking soda
2 tsp cinnamon
1 tsp ground cloves
1/2 tsp nutmeg
1 tsp ginger powder
1/4 tsp salt
Wet:
90g (3.2oz) room temperature butter
100g (3.5oz) sugar
130g (4.6oz) molasses
2 Tbsp freshly grated ginger
1 large egg
Topping:
Chopped candied ginger
Directions
1.  Sift the dry ingredients together and set aside.
2.  Cream the butter and sugar together, then whisk in the molasses.  It may be hard to stir.. molasses is a sticky caramelized licoricy mess.  But mmMmmMm!
3.  Whisk in the grated ginger.  When it is all well incorporated, whisk in the egg until nice and homogenous.
4.  Ditch the whisk and prepare your wooden spoon. Add the dry ingredients into the wet ones a little at a time.  It will be nice and stiff..hang in there.
5.  When all the dry ingredients are incorporated, preheat the oven to 350°F 180°C.
6.  Make tablespoon sized balls with the dough, dip into the chopped candied ginger, and press onto a cookie sheet.  make sure to space each cookie out at least 1 1/2 inches apart.  It is actually easier to handle if you chill the dough beforehand.
7.  Bake for 10-12 minutes.  10 for chewy, 12 for crunchy.
8.  Remove onto a cooling rack and let cool at least 15 minutes!  Do not be too impatient..

The result is a light crispy chewy cookie full of ginger and spice and everything nice...
Ginger does make this world a happier place.

Print Friendly and PDF

Friday, December 25, 2015

Banana Cream Pie

I know this doesn't look like anything sexy enough for a holiday dinner.  I wasn't planning on the banana I used as a topping to turn brown during chilling time.  Of course I should have known it.. but I just wasn't thinking.
This was, however, a mouthful (or several mouthfuls) of pure banana bliss.  Even non-dessert lovers ate their entire slice after an entire holiday meal!
I'm always weary of custards because you never really know how they're going to turn out until it's too late for a plan B.  If it says to chill 1 hour and you only let it chill 1 hour.. well, you're probably going to be out of luck.. because NOTHING sets in just 1 hour.  Those are lies.. all lies.
Also.. who tries a "needs time to set" recipe for the first time on Christmas Eve?  Someone crazy.. that's who.  Me.
Ingredients
Shortcrust:
80g butter, cubed
125g buckwheat flour
125g flour
pinch salt
1 Tbsp nutritional yeast
1 packet vanilla sugar
2 Tbsp cane sugar
1/2 tsp cinnamon
1 very ripe mashed banana
1 egg yolk
2 cL water
Use the method and bake for 30 minutes at 190°C
Filling:
75g cane sugar
1/3 cup cornstarch
1/4 tsp salt
1 1/2 cups coconut milk (or normal milk)
1 1/2 cups cream
3 egg yolks
1 tsp vanilla extract
2 Tbsp butter
1 banana sliced lengthwise
3 bananas sliced into 1/4 inch rounds
Directions
1.  Whisk together in order the sugar, cornstarch, salt, milk, cream, an egg yolks.
2.  Pour the mixture into a saucepan on medium to high heat.  Whisk continuously until the mixture thickens, about 6 minutes.  You don't want it to be clumpy, but evenly thick where it will not drip off a spoon.
3.  Remove from heat.  Whisk in the butter and vanilla extract until dissolved.  Let cool.
4.  In your pre-baked shortcrust, spread a hefty layer of custard on the bottom.  Add in the banana rounds in a layer.  Repeat until you run out of custard and bananas.
5.  If you want to make it like mine, add the last banana sliced lengthwise on the top of the last layer of custard.  This step can be done right before serving to avoid the browning.
6.  Chill in the fridge for at least 3-4 hours.  I let mine for 11.
After 11 hours, this baby was NOT runny.
It was a silky delectable consistency full of ripe banana flavor without being overwhelmingly sweet.
Just a perfect end to a delightful evening with Friends that are more like Family...

Print Friendly and PDF

Friday, December 18, 2015

Mouttabal Al-Yaqteen (Pumpkin Tahini Dip)

As an intro to my Falafel Soiree, I wanted something that fit the theme, but that was new and refreshing.  This Syrian pumpkin dip is as old as time, but it was a discovery to me.  I had no idea pumpkin or squash was that popular anywhere else but in the Americas.  It is quite simple to put together once everything is prepped.. it really only takes a few minutes.  The longest part would be roasting the pumpkin and letting it cool.
Fortunately, I must have seen this discovery in my near future the day I brought home a nice plump Delica Moratti pumpkin and roasted it whole for my pumpkin pie urge of the moment.  Since one pumpkin yields quite a bit of flesh, I froze the roasted flesh pound by pound.. you know, just in case.  I was probably preparing for more pie urges.. or some sort of creamy chili, but bless my soul.. that was the perfect amount for this lovely Mouttabal Al-Yaqteen!
Recipe from Desert Candy
Ingredients
450g (1lb) roasted pumpkin flesh (mine was Delica Moratti)
1 large clove garlic, smashed
75g (3/8 cup) tahini
juice from 1 lime
1/2 tsp cumin
pinch salt
toppings:
handful fresh pomegranate seeds
drizzle pomegranate molasses
Directions
1.  Blend everything together until it has a smooth homogenous consistency.  Taste and adjust the seasoning if needed.
2.  Serve topped with fresh pomegranate seeds and a drizzle of pomegranate molasses.
I served mine for happy hour with some Luques olives and some turkish cheese stuffed chiles.
I also had some Man'Ouché bread for dipping.
The fresh tart beads of pomegranate are really what take this over the top.  The pumpkin is lightly sweet with the nutty creaminess of the tahini, making it a perfect dippable texture.. but those little beads of sweet juiciness that explode as you bite into them give so much dimension it seems they were made to be paired together.  The molasses evens out the flavors as well.
As long as you have roasted pumpkin handy.. Mouttabal should be on your mind...

Print Friendly and PDF

Wednesday, November 25, 2015

Immune Booster Chunky Beetroot Soup

I love beets no matter what the reason, but this time, I decided to use them for healing.  My throat has been starting to feel sore and I would like to kick that to the side before it claims anything more on me.  I felt I needed something full of vitamins that I could also enjoy as a meal (not just a tablet or a drink with boosters).  I was thinking something along the lines of Borscht but vegetarian and with ginger.  The vegetarian part was mostly to cut down on cooking time and also because I didn't feel like grocery shopping.  This little idea flowered into a perfect winter meal.  I was going to use beans in place of the meat.. but for the cooking time, I decided to use quinoa instead.  Those little magic pearls explode into glossy little soldiers floating around in the soup.  They are perfect for body and for the protein component... making this a full meal.
Serves 3-4
Ingredients
1 Tbsp olive oil
1 tsp caraway seeds
1 tsp mustard seeds
1 onion, peeled and diced
1-2 green chiles, diced
1 large raw beet, peeled and diced
1 large carrot, peeled and diced
4-6 cups vegetable broth, depending on the soupiness you want
3 cloves garlic, grated
1 inch ginger, grated
1/2 cup rinsed quinoa
2 Tbsp balsamic vinegar
2 handfuls torn kale leaves
lots of freshly ground black pepper
Salt to taste
Directions
1.  Heat the oil in your soup pot and add the caraway and mustard seeds until they start to snap and crackle.
2.  Add the chopped onion and chiles and cook, stirring, until onions are translucent.
3.  Add the beets, carrots, and enough broth just to cover.  You will decide how liquid you want it later.  Cover and simmer for about 10 minutes.
4.  Add the quinoa and a bit more broth.  Cover and simmer for another 15 minutes.
5.  Add the balsamic vinegar and black pepper and stir, then add the kale leaves on top.  Add more broth if needed.  Simmer for another 5 minutes.
6.  Stir and taste.  Add salt if needed.  I didn't think it needed any adjustments.  The natural flavors are so present that they need very little to go a long way.

Serve hot!

The kale leaves were a very nice twist on the use of cabbage.  It reminded me of the extra step they bring to Zuppa Toscana, my favorite "Restaurant" soup.  They don't become rubbery and strange in the broth the way green cabbage does.
They were the Perfect topping..

Print Friendly and PDF

Sunday, November 22, 2015

Persimmon Apple Cobbler with Green Chiles

This last week I've been trying to figure out a way to make an All American dessert to go with my Kale Chips and Chili.  I usually go with Pumpkin Pie but one of my guests had already witnessed that.. so I had to find something else to fit the theme.  I also wanted to use Persimmons because they are beautiful as adornments to their leafless trees and are really in season.  When I stumbled upon a cobbler recipe using green chiles.. it literally called out to me and took over my brain cells.  I twisted and turned the the idea in my head for an entire week, trying to figure out if I should make a pie, make individual ramekins of cobbler, make a crumble, or just go with the whole messy looking thing and call it "la bonne franquette," which means.. please don't mind the look, just enjoy.
Well, I'm happy I did because I discovered cobbler.  I don't remember ever eating anything called cobbler and I certainly have never made it before, so with a major cutdown on the original sugar amount (it called for more than double what I used) I had something nice and caramelized on top but creamy .. and slightly spicy on the inside.
This dessert could not have been more Me.
Inspired by HomesickTexan
Ingredients
Filling:
2 apples (I used Gala) peeled, cored, and diced
2 persimmons, peeled, cored, and diced
1-2 jalapeños, roasted, peeled, seeded, and diced
1/2 tsp cinnamon
1/4 tsp fivespice
1/8 tsp nutmeg
Juice from 1 lime
2 Tbsp dried pomegranate seeds
Crust:
100g (3.5oz) butter
50g (1.8oz) buckwheat flour
50g (1.8oz) oats
20g (0.7oz) wholewheat flour
75g (2.6oz) brown or cane sugar
2 tsp baking powder
Pinch salt
3/4 cup whole milk
Directions
1.  Toss all the filling ingredients together and place in a buttered pie dish, spread evenly.
2.  To make the batter, mix all the ingredients except the butter together.
3.  Melt the butter in a pan on low heat until completely melted.
4.  Pour the batter mixture over the butter off heat.  Do not stir.
5.  Pour the batter with the butter into the pie dish over the filling.
6.  Cook at 350°F 180°C for 45 minutes until the top is caramelized.
Eat warm!

When the cobbler is still warm, it will be hard to get it to slice like a pie.  It doesn't matter.  Just serve and enjoy!  Another variation is to make individual servings... but who wants to go through all that trouble when you just want to relax and have a good time?
Next time I will use even less sugar because I don't think it really needs it.  The fruit is so naturally sweet that it seems almost sacrilegious to take the attention away from it...

Print Friendly and PDF

Thursday, November 12, 2015

Zucchini is invited into my Fajitas now

So what happens if you only have 1 bell pepper and a mega urge for fajitas?
Use zucchini!
If cooked correctly, it keeps its texture and doesn't become a boring piece of watery mess that takes up space in your plate.
Yes.. it IS important to know how to cook vegetables or you will never be able to appreciate them correctly!  Many people have told me they don't appreciate this or that because it adds no value to the finished product.  You cannot just talk a vegetable into adding value.. even if you DO talk to your food (I know I do).  You are the master of this art.  The thing about zucchini is that it is part of the squash family.  Squash, once cooked, loses its texture and is most often blitzed into a purée or a soup.  If you are not careful, it can get floppy.
This technical issue makes it a perfect candidate for stir-fried type of dishes like fajitas.  You don't cook the vegetables for a very long time so they keep their snap.
Serves 4
Ingredients
250g (1/2 b) chicken breast, sliced thinly
1 garlic clove, grated
few pinches fleur de sel
squeeze from 1/2 lime
few grinds black pepper
1/2 tsp coriander powder
1/2 tsp cumin
1/4 tsp paprika
1/4 tsp chile powder (optional if serving with spicy beans)
1+1 Tbsp olive oil
1 onion, sliced into moons
1 red bell pepper, sliced
1 large zucchini, cut into bell pepper like slices.. not too thin
1 green chile, sliced (optional if serving with spicy beans)
Directions
1.  Rub the grated garlic onto the chicken slices and sprinkle on some fleur de sel, black pepper, cumin,  coriander, chile powder, and paprika.  Add the lime juice, rub in to make sure everything is evenly distributed.  Set aside and let marinate for at least 10 minutes (while you chop everything else.)
2.  Heat 1 Tbsp of the olive oil on high in a wok or heavy based pan.  Add the onion slices and stir fry until just translucent, then add the bell pepper, zucchini, and green chile slices with a pinch of fleur de sel.  Cook on high, stirring for about 3-5 minutes.  Reserve.
3.  Heat the other Tbsp olive oil into the same wok.  Add the marinated chicken slices and cook until nicely colored.
4.  Add the vegetables to the meat and heat through.  You want the bell peppers and zucchini to be crisp, so don't over-cook them into mush.

Serve with some Black Beans and Rice.  Don't forget to add some shredded cabbage, cheese, sour cream, and your favorite salsa!

Now if only I could get a hold of proper tortillas...

Print Friendly and PDF

Tuesday, November 10, 2015

Caraway, Tuna, and Broadbean Soup

Soup season doesn't mean you have to drink your dinner.  I personally prefer chunky creamy soups to velvety smooth blended soups.  I have different thickening methods, but my all-time favorite is to use beans.  Once they're cooked, I blend some together with the cooking liquid and pour it back into the pot.  The result is similar to cream.. without the cream, but with all the goodness of creaminess!
Serves 2
Ingredients
1 Tbsp olive oil
1 tsp caraway seeds
1/4 tsp turmeric
1 green chile, slit
1 chopped onion
1/2 cup dried split broad beans, soaked for at least 1 hour
water to level
1 cube vegetable bouillon
1 carrot, diced
2 handfuls cauliflower florets
1 can tuna, drained
1/4 cup frozen peas
lots of cracked black pepper
grated parmesan for garnish
Directions
1.  Heat the oil in the soup pot and add the caraway seeds when it is hot.  When the seeds start to crackle, add the turmeric.  It should fizz.
2.  Add the green chile and onions and cook until translucent.
3.  Add the soaked broadbeans, carrot, cube of bouillon, and water to level.  Cover and simmer for about 15 minutes, until the beans are almost tender.  Remove a ladle with the beans and set aside.
4.  Add the cauliflower florets and more water if needed.  Simmer for 5 more minutes.  You don't want to overcook the cauliflower or it will be come mushy.
5.  Add the tuna, peas, and black pepper.  Judge the water level yourself.  Heat through for a few minutes.
6.  While that is happening, blend the beans you set aside in step 3 and pour them back into the soup. This is your thickener.  The liquid should no longer be clear.  Taste and add salt if needed.

Serve garnished with parmesan.  I found some excellent multigrain bread to sop up the last bits with.
Bread and caraway also go hand in hand by the way.

This is is one of those dinners I created as I progressed through the steps and made sure to write each detail down so I could recreate it.  It was everything I love about a soup with a little mix of Indian style technique.  Cauliflower and caraway seeds are a perfect match, but frying them in oil and then adding the turmeric for a fizz is the best way to have them release their flavor.  I love the way the method can be applied to any type of dish.. not only Indian food..
(as I say this, bhangra music is playing in my head)

Print Friendly and PDF

Sunday, November 8, 2015

Ginger Oatmeal Peanut Butter Cookies

Ginger.
It's the root of all life and all remedies.  It gives heat without spice, flavor without salt, and a full load of nurture in its nature.
This week ginger has been on my mind.. and it materialized in normal rounds of dinners, but it was the star of these cookies..
This recipe is similar to the Oatmeal Cocoa Bean Cookies, but with a slightly different twist.
Yield 40 small cookies
Ingredients
90g (oz) room temperature butter
30g (oz) natural peanut butter
115g (oz) brown sugar or cassonade
1 egg
70g (2.5oz) flour
1/2 tsp baking soda
1/4 tsp salt
1/2 tsp ground cinnamon
1 tsp ground ginger
1 1/2 cup oats
100g (3.5oz) dark chocolate, broken into bits (mine had coffee beans in it)
20g (oz) roasted cocoa bean, crushed with a mortar and pestle into chunks
4 Tbsp minced candied ginger
Directions
1.  Sift the flour, baking soda, spices, and salt together and set aside.
2.  Cream the butter, peanut butter, and sugar together.
3.  Add the egg and beat well until as homogenous as you can.
4.  At this point, I like to switch to a wooden spoon.  Add in the sifted dry ingredients a bit at a time until evenly incorporated.
5.  Stir in the oatmeal, crushed cocoa beans, candied ginger, and dark chocolate bits.
6.  Place 1 Tbsp sized balls of dough onto a baking sheet, separating each ball at least 1 1/2 inches apart.  With 1 Tbsp I had around 40 cookies.
7.  Bake in a preheated oven at 190°C 375°F for 12 minutes.
8.  Remove and let cook on a wire rack at least 10 minutes before eating.

They look so perfect in that cookie jar!

Print Friendly and PDF

Thursday, November 5, 2015

Tandoori Roasted Eggplant with Pear

Sometimes I have different cravings at the same time.  Those days I just zone out and put my inner cook on autopilot.  Sometimes the result is ok, but not breathtaking.
This time it was a masterpiece.
The balance, between textures, spiciness, sweetness, and Indianness makes it so perfect I wouldn't be surprised if I was served this as an appetizer at a classy restaurant.
I wanted eggplant but had some leftover chutney that needed to be used up.  I only needed to cook for myself so I set myself free and let it happen.  I took my desired eggplant, sliced it, rubbed with tandoori spice and then found a pear that had been hanging out in the fridge for a while and decided to do the same with it.  The worst that could happen would be if cooked pear and tandoori didn't go together.
What happened?
Ultimate witchcraft.  A mesmerizing state of mind during the enjoyment process.  Something I had to absolutely document so I can make it again and serve it to actual humans...
Serves 2-3 as an appetizer
Ingredients
1 large eggplant, cut into 4-5 lengthwise slices
1 pear, peeled, cored, and cut into wedges
1 green chile, split
1 1/2 tsp tandoori spice
1 Tbsp olive oil
Directions
1.  In a baking dish, rub the tandoori spice all over each slice of eggplant, pear, and green chile, then toss with the olive oil.
2.  Spread out in one layer and roast for 30 minutes at 200°C 400°F.

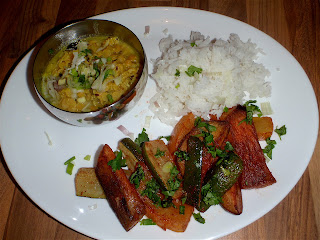
Serve with Spicy Cilantro Chutney

or do it again with Persimmons, and Zucchini instead of pear
and serve as a "real" meal with basmati rice and dal.

I had the entire thing for dinner because I could not stop myself from savoring each and every little piece.  Each bite is an adventure in itself.. and with the chutney you skyrocket off your seat.
I cannot wait to make this for company.
It is a high class appetizer.. plus, I won't be offended if you eat it with a knife and fork..

Print Friendly and PDF

Monday, November 2, 2015

Beetroot Pakoras

This weekend I was invited to a party and asked to bring an appetizer.  That news in and itself was thrilling and got my gears churning all week to figure out what to make.
I was told to stay within reasonable limits because it was to be served alongside a gratin dauphinois....
That completely blocked my gears.
All I wanted to do was make Lobia Pakoras with chutney and now I find out it has to go with a potato and cream casserole.  How in the hail am I supposed to make something that crazy happen?
Well, lets see.. since a gratin dauphinois is pretty heavy, I should make something light with vegetables.  Ooh beet pakoras!  PERFECT!
All I had to do was present them as beet fritters with cilantro "coulis" to make it sound local enough to psychologically be paired with whatever was going to be served.
After 2 days of trying to find a "French-ish" recipe that I could be proud of, I found the absolute perfect way to break the ice... Indian style.
Original recipe from Padma'sRecipes.
Yield 22 pakoras
Ingredients
1/2 cup toor daal, soaked overnight
1/2 cup chana daal, soaked overnight
1 medium beet, peeled and grated (about 1 cup)
1 large carrot, peeled and grated
1 green chile, finely minced
1 red onion finely minced
1 inch piece ginger, grated
1 sprig curry leaves
2 pinch hing
1/2 tsp salt
sunflower oil to fry
Directions
1.  Drain the daals and grind them with the hing, salt, and curry leaves into a paste.  It shouldn't be an evenly smooth paste.
2.  In a mixing bowl, stir together the dal paste and the vegetables.  Knead until everything is evenly distributed.  I pulsed my hand blender in the mix a few times to help it come together.  It should not be goopy or watery, but if you form a ball with your hands it should stay together.
3.  Heat the frying oil.  Make balls and press them tightly together.  Carefully drop the balls into the hot oil.  Do not overcrowd.  You should have enough oil to almost cover the pakoras.
4.  Cook 3 minutes, then flip and cook another 3 minutes.  They should be golden and crispy.  Reserve onto paper towels.
5.  Reheat if needed in the oven for 10 minutes so they keep their crispiness.

I served with a duo of Spicy Cilantro Chutney and Sweet Tamarind Chutney.

This was a great success.  Although they were fried, they were light and crunchy and went perfectly with both chutneys.  The Sweet Tamarind actually enhanced the flavor more than the Spicy Cilantro.. but I can eat that one by the spoonful whether or not there are pakoras or samosas!  I was asked for the recipe.  WIN!
I'm very happy I didn't listen to the "advice" about staying French.  If I have something on my mind, you can't ask me NOT to do it.  The human brain just does not work that way.

Print Friendly and PDF

Tuesday, October 27, 2015

Purple Cauliflower Soup with Caramelized Onions and Cêpes

Some people just know me so well, it brings tears to my eyes.  Like my good friend who offered me a purple cauliflower for no apparent reason other than to see my reaction and what I would possibly be doing to it.  It's almost as if she knew she was giving it a good home by offering it to me.  Those are the types of gifts that touch me deeply.
The dizzying purple color was putting me into wild food trances.  I imagined a vibrant purple soup and how sexy it would be if I blended it into a smooth velvety creamy texture.  I imagined how I would decorate it with caramelized onions and sautéed cepe mushrooms and garlic croutons.
All my dreams came true except for the color.  I thought roasting it as opposed to boiling it would help it keep its color.
Alas.. my sexy vibrant purple soup was taupe.. but oh was it delicious and Earthy.. just the way I like it!
Serves 3-4
Ingredients
1 head purple cauliflower, broken into small florets
3 carrots, cut into sticks
1 head garlic, skin on
1/2 tsp ground cumin
1/2 tsp ground coriander
1/4 tsp salt
Olive oil to toss
1-2 cups water
Toppings:
2 large yellow onions, sliced into moons
1-2 large cêpe mushrooms, or 200g wild mushrooms, sliced
2 Tbsp olive oil
drizzle balsamic vinegar
garlic rubbed croutons
dollop of yogurt (optional)
1 chile de arbole (optional)
Directions
1.  Mix the ground cumin, coriander, and salt together and sprinkle on the cauliflower florets and carrot sticks.  Drizzle it all with olive oil along with the head of garlic and place in a single layer in an oven tray.  Bake at 200°C 400°F for 20 minutes.
2.  While that is happening, make the toppings.  Heat 1 Tbsp olive oil in a pan and add the sliced onions.  Cook on medium until browned (about 10-15 minutes) and deglaze with the vinegar.  Set aside.
3.  Heat the other Tbsp olive oil in a pan and add the sliced cêpe mushrooms.  Cook on medium until glossy (about 10 minutes).  Set aside.
4.  When your good stuff is done roasting, transfer it to a pot and add just a bit of water.  Squeeze the garlic out of its paper and blend it all with an immersible hand blender.  If you like it thin, use more water.  I like it thick.  I probably used 1 1/2 cup.
5.  Heat through in case it cooled down before serving.

Serve hot ladled into bowls garnished with the desired toppings.

Set aside the disappointment about the color.. because taupe is pretty too!

Print Friendly and PDF

Friday, October 23, 2015

Chicken Tajine with Preserved Lemon and Artichoke

Sacrilege!  Am I allowed to call this a tajine when I used chickpeas and quinoa?
Well, this type of cooking is not native to me so I have no issues with rule breaking.  There are certain things I would never permit if this was Indian food .  Certain things were made to be the way they need to be made.  I would never serve pasta with daal.. or beef korma.. nor would I ever put bacon in couscous (ok that's not Indian, but still, I wouldn't do it although I've seen people do it!)  I have no problem using paneer instead of tofu or subbing ground turkey for ground pork in Chinese recipes.  I also don't mind using Korean noodles in a Vietnamese dish.  This dish is the same.  I wanted all the little things separately and perfectly within the same dish.  The cooking method just happens to be called "tajine", which is why I permitted myself to name the dish this way.
Traditionally, a tajine is a slow cooked dish of vegetables and mixed spices with very little liquid that is sopped up with some sort of bread or couscous.  It can be made with meat or fish, but they are not submerged in the cooking liquid.  They are rather steamed or roasted atop the vegetables in a circular pyramidal clay cooking vessel also called a tajine.  They usually do not include any beans such as chickpeas.
I wanted chickpeas and I really don't regret it.. sorry purists.
Serves 4
Ingredients
4 chicken legs
1 cup cooked chickpeas (or 1 can, drained)
2 cloves
1 cinnamon stick
1 tsp cumin seeds
1 tsp whole black pepper
2 dried red chiles
2 preserved lemons, pulp discarded and rind sliced
1 can artichoke hearts, drained
1 large onion, sliced into moons
1 green chile, halved (I used a Kabyle chile)
few pinches saffron
1/4 cup water
garnish:
chopped cilantro
lime wedges
Directions
1.  Place the chickpeas at the bottom of the slow cooker along with the cloves, cinnamon stick, cumin, black pepper, dried chiles, and preserved lemon.  Layer on the onion, chicken legs, artichoke hearts, green chile, and saffron.  Pour the water in.  You want the chicken and artichokes to be above the water level so they will "roast" and not soak.
2.  Cook on low for 6 hours.

I served mine with some bulgur and cilantro.
After the hours of cooking, the chicken releases its juices to make a very tasty sauce.  I didn't feel it needed salt, but you might want to add a bit of fleur de sel to your plate.
I put the Kabyle chile on the top so I could easily remove it before serving.  I wanted it to infuse the cooking ambiance but I wanted to have it spice my own plate up and not the entire dish.
I feel I have finally figured out the preserved lemon thing.  You either leave them whole and then remove them after cooking or you'd better remove the pulp.  That pulp is very hard to palate so I was happy to not feel like my dinner was harassing me.
Although.. sometimes I like mealtime harassement...

Print Friendly and PDF

Thursday, October 22, 2015

Green Pea and Feta Quiche with a Millet Crust

I stumbled upon this idea from while flipping through DesertCandy a few months ago.  The idea completely intrigued me.  Peas.. in a quiche??  I tweaked a few things but the basic idea is the same.  Put peas and cheese in a quiche.  How fabulous!
I've made this twice and each time was a success.  I was even asked to make it again for the next quiche occasion!
Serves 6 as an appetizer
Ingredients
2 Tbsp olive oil
1 onion, sliced into moons
drizzle balsamic vinegar
100g (3.5oz) fresh spinach
2 cups frozen peas
2 large cloves garlic, grated
200g (7oz) feta, cut into cubes
2 Tbsp freshly chopped mint
4 eggs
1/2 cup heavy cream
1 cup full milk (I used goat)
few pinches salt
lots of ground black pepper
1/2 cup millet, rinsed
Directions
1.  Heat 1 Tbsp olive oil in a sautée pan and cook the onions on medium heat until they are glossy and dark in color.  Deglaze with balsamic vinegar.  Remove from heat and set aside.
2.  Heat the other Tbsp olive oil in the same pan and add the fresh spinach.  Sautée for a few minutes with a pinch of fleur de sel, some pepper, and 1 of the grated garlic cloves.  This takes about 4 minutes.  Remove from heat and set aside.
3.  Rinse the frozen peas in a colander under warm water.  Drain and transfer to a mixing bowl and stir in the other clove of grated garlic and the chopped mint.  Smash some of the peas.  I used my hands and squished some.
4.  In a mixing bowl, beat the eggs until frothy.  Add the milk and cream and beat until frothy again.  Add a bit of salt and cracked black pepper.
5.  Oil your baking dish and spread the millet along the bottom.
6.  You are now ready to assemble.  Place the cooked onions over the millet, followed by the sautéed spinach.  Add the peas and try to even out the layer.  Press the feta cubes into the peas.  Help them nestle in and find their place.  Pour the egg and cream mixture over it all.
7.  Bake for 50 minutes at 185°C 365°F
8.  Let cool at least 1 hour before eating.

Serve warm or at room temperature.

The millet hardens the longer it sits to form a nice crust that is crunchy and tender all at once.
The mixture of ingredients is completely surprising but works like magic.  I absolutely love the texture of the half smashed, half whole peas and their natural sweetness contrasted with the feta.  Those two make a lovely pair...

Print Friendly and PDF

Monday, October 19, 2015

Pear and Cocoa Bean Tart

It is pear season here in France, and although pears are not the fruit I go crazy nuts for, they can be quite sexy when paired with the right ingredients and served in the right crust.
Pears, Chocolate, and Ginger.. oh yes.. NOW we're talking!
I wanted to make something French for my American visitors.. which is quite hard because I mostly get off on making pumpkin pie, cookies, and burfi.. things all very familiar to my VIP guests.  While trying to come up with something not so out of the box, but something I had never thought to make, my trip to the market and the myriad varieties of pears on the stalls had me flowing with ideas.  In France, pears and chocolate are a typical dessert.  Usually the pear is poached and then dipped in a chocolate syrup.. or served with ice cream, chocolate, and whipped cream.  I'm pretty sure a chocolate & pear pie is a thing, too.. but I'm CERTAIN that they never put cinnamon or ginger in their desserts.
Which is why I was so happy to do it.. and why this dessert came out so classy!
Serves 8
Ingredients
Shortcrust:
100g (3.5oz) room temperature butter, cubed
130g (4.6oz) flour
100g (3.5oz) buckwheat flour
1 Tbsp nutritional yeast
Pinch salt
3 Tbsp cane sugar
1/2 tsp cinnamon
1 tsp ginger
1 egg yolk
5 cL water
Use the method, then pre-bake at 190°C 375°F for 10 minutes

Filling:
4 small pears, peeled, cored, and sliced crosswise (I used the Louise-Bonne variety)
1 egg + 1 egg yolk
Cream
1/2 tsp cinnamon
Pinch nutmeg
1 tsp ground ginger
1 packet vanilla sugar (or 1/2 tsp extract)
1 Tbsp cane sugar
15g (0.5oz) Crushed cocoa beans
40g (1.5oz) Dark chocolate shavings

Directions
1.  Beat the egg and extra yolk together in a mixing bowl until frothy, then beat in the cream, cinnamon, nutmeg, ginger, and sugar.
2.  Sprinkle 3/4 of the chocolate beans and shavings at the bottom of the pre-cooked shortcrust, then lay the pear slices, pressing them down diagonally onto the shavings.
3.  Pour the egg and cream mixture over the pear slices and sprinkle with the rest of the chocolate.
4.  Bake at 190° for 40 minutes or until golden.
5.  Let come to room temperature before serving (refrigerate for at least 1 hour).

This is probably the prettiest dessert I've every made.  I love the architecture of the slanted slices topped with dark chocolate.  It's also quite tasty and not too sweet, which is perfect for me.
The cocoa beans played a nice role presenting their deep roasted flavor that paired well with the pears and filling.  I've made this twice for completely different populations and I will be making it again with different fruit.. as long as I keep it pretty!

Print Friendly and PDF

Sunday, October 18, 2015

Mushroom "Butter" Masala

I first made this as a test, just because I was craving mushrooms.  That day my camera was not functioning so I did not snap a shot of it.  I then made it for my best friend while she was visiting from San Diego.  We were so caught up in the action that I just completely forgot to snap a shot.  That day was amazing.  I learned to share my kitchen with others in a symbiotic way.  That day, cooking became more of a social activity than an individual therapy.  There are times when the journey is just as important as the destination.  I don't think there are many people with whom I would feel comfortable enough to cook with.. but this friend is like a part of me.  We've been through enough together to give her an open view into any part of my strange pathologies.  That day was so pleasant that I absolutely had to try it again.. because if I ever crave it again and I don't document it, how will I ever find the recipe again?
I freestyle so often that when something is perfect, I must absolutely photograph it and write it down so I can replicate it.. otherwise I'll just divert it into something else, which would still be good, but it wouldn't be THIS.
Serves 4-5 in a thali or 3 as a main dish
Ingredients
3 tomatoes
20 unsalted cashews
4 cups boiling water
3 Tbsp coconut oil (or butter or ghee)
1/2 tsp cumin seeds
1 tej petta (Indian bay leaf)
1/2 inch stick cinnamon
2 green cardamom pods
2 cloves
2 dried red chiles
1 onion, diced
350g button mushrooms, sliced thickly
1/8 tsp turmeric
1/2 tsp coriander powder
1/2 tsp chile powder
1 cup water
salt to taste
2-3 Tbsp coconut cream (or regular cream)
1/4 tsp garam masala
1/2 tsp methi (fenugreek leaves)
garnish:
fresh ginger cut into strips
chopped cilantro
Directions
1.  Make the cashew tomato paste.  Place the tomatoes and cashews in a bowl and pour the boiling water over them.  Let sit for at least 20 minutes, then drain, blend into a paste, and set aside.
2.  In a wok or heavy based dish, heat the coconut oil and add the cumin seeds, bay leaf, cinnamon, cardamom, cloves, and dried chiles.  Cook until the cumin starts to sputter.
3.  Add the onion and cook until translucent.
4.  Add the mushroom slices and cook on high, stirring, until glossy.
5.  Add the turmeric, coriander powder, and chile powder, then add the cashew-tomato paste.  Cook until it thickens and reduces.
6.  Add the water and stir, then simmer on low for 7-8 minutes.
7.  Add the cream, garam masala, and dried methi.  Cover and switch off the heat until ready to eat.
8.  Serve garnished with chopped cilantro and ginger strips.
I served mine in a thali with some Sweet Potato Panch Poran, Tandoori Okra, Whole Mung Dal, basmati rice, and rotis.
This dish must have taken it's toll on me because I made it during another kitchen activity session with a new friend.  I feel this is the beginning of a lovely adventure...

Print Friendly and PDF

Monday, October 12, 2015

Oatmeal Cocoa Bean Cookies

After what seemed like an eternity of cookielessness, inspiration came to whisper into my ear, smelling of cocoa beans ans cinnamon.  This summer I visited the Valhala of chocolate.. The Valrhona city of chocolate where each step of the chocolate making process was accompanied by a taste test.  It was an interesting experience that tested touch, smell, and of course, the different parts of the tongue reacting to taste.  Aside from just gorging on quality chocolate, I was impressed the the cocoa tree and it's magnificent raw fruit, the cabosse.
The delicate white flesh from the cabosse is similar in taste and texture to a lychee, and the beans are actually the seeds of the fruit.  They must be fermented, then dried, then washed, then dried, then roasted before they can start to become what we know as chocolate.  They start to be edible after toasting, where they release their delicate chocolate aroma, but are still 100% bean, so not at all sweet.  Over the years I've been leaning more and more toward very dark chocolate..in the same way that I like my coffee black.  I feel like I'm tasting the real thing instead of eating candy.  Chocolate for me is more of a degustation than a snack.  It is a small taste of our Earth's many hidden treasures.  When I saw you could actually buy the whole untransformed toasted cocoa beans, I was thrilled.  They are slightly bitter but nice to chew on as the flavor develops while your saliva breaks it down.  When a good friend offered me a bag of these little beans, I decided to try cooking with them instead of just munching on them.  As it turns out, they work magic in oatmeal cookies!
Yield 3 dozen small cookies
Ingredients
115g (1/2 cup or 4oz) room temperature butter
105g (3.7oz) brown sugar or cassonade
1 egg
1 vanilla bean, scraped (or 1/2 tsp extract)
70g (2.5oz) flour
1/2 tsp baking soda
1/4 tsp salt
1/2 tsp ground cinnamon
Pinch nutmeg
1 1/2 cup oats
100g (3.5oz) dark chocolate, broken into bits (mine had coffee beans in it)
85g (3oz) roasted cocoa bean, crushed with a mortar and pestle into chunks
Directions
1.  Sift the flour, baking soda, spices, and salt together and set aside.
2.  Cream the butter and sugar together.
3.  Add the egg and vanilla and beat well until as homogenous as you can.
4.  At this point, I like to switch to a wooden spoon.  Add in the sifted dry ingredients a bit at a time until evenly incorporated.
5.  Stir in the oatmeal, crushed cocoa beans, and dark chocolate bits.
6.  Place 1 Tbsp sized balls of dough onto a baking sheet, separating each ball at least 1 1/2 inches apart.  With 1 Tbsp I had 3 dozen cookies.  They are a perfect size for me, but go ahead and make them bigger if that's what you prefer.
7.  Bake in a preheated oven at 190°C 375°F for 10-12 minutes.
8.  Remove and let cook on a wire rack at least 10 minutes before eating.

Ladies and Gentlemen.... cookie season has officially begun!

Print Friendly and PDF

Monday, September 28, 2015

Long Chinese Eggplant Japchae

Today was a good day.  Our Earth's amazing fruits have been offered to me for my intense discovery and enjoyment.
Long Chinese eggplants, also called finger eggplants found their way to my desk this morning along with a few jars of homemade jam.  Those eggplants have the word "finger" in them and they are purple!!  'Nuff said.
I also discovered some chiles from the Kabyle area of Algeria offered by a neighbor.  This dinner was the perfect combination of the gifts of life (minus the jam.. because it just wasn't going to happen for dinner).
Serves 3-4
Ingredients
3-4 long Chinese eggplants (finger eggplants), quartered lengthwise and cut into pieces
1 Tbsp oil (I used coconut)
Japchae:
2 Tbsp oil
1 onion, sliced into moons
2 carrots, grated
1 cup cabbage, shredded
1/2 cup sliced leeks
2 eggs
1 green chile (mine was from Kabyle)
250g Dangmyeon noodles (Korean sweet potato starch noodles), cooked and piping hot
Sauce:
1 tsp doubanjiang paste (Pixian broadbean chile paste)
2 Tbsp light soy sauce
2 Tbsp black vinegar
4 garlic cloves, grated
1 inch piece ginger, grated
Garnish:
few drops sesame oil
chopped green onions
sesame seeds
crushed peanuts
Directions
1.  Start with the eggplants.  Heat the oil in a wok or heavy based pan and cook the eggplant slices in one layer for about 3 minutes, then flip and cook until all sides are colored and they are bite tender.  Remove and set aside.
2.  Make your sauce by stirring all the ingredients together.
3.  Heat 1 Tbsp oil in the wok and cook the onions until translucent.  Push them to the sides of the wok and add the carrots and leeks in the center.  Stir fry for about a minute, then push to the sides and add the cabbage and green chile.  Stir fry for about 2 minutes, then push to the sides.
4.  Add the last Tbsp of oil in the center of the wok.  Crack the eggs and let them set a bit.  Stir to break them, then stir fry everything, adding half the sauce.
5.  Add the cooked hot noodles and the eggplants along with the rest of the sauce and heat through.
6.  Serve with desired garnishes

Anything mixing Korean style cooking, Chinese vegetables and Algerian chiles can only be a win win situation.  This was a slice of heaven on a cold day..

Print Friendly and PDF

Sunday, September 20, 2015

Panch Poran Zucchini and Butternut Masala

There are days when I try very hard to cook this way.. And there are days when I find myself unable to cook any other way.  Those are the days when I know I want moong beans, for example, and that's it.  I have to rummage my way around my fridge and pantry to work around that one urge.. Because When I want moong, I want the whole experience.  My brain goes into autopilot and I become the puppet of my subconscience.  Today, I surprised myself as I sat down to enjoy my mung dal that all these other friends had come to enjoy the party.. Especially Mr. Zucchini.  That fellow has never come to join my India evenings.  Today, my Id must have done some coaxing for him to join us.. And I'm very happy he accepted the impromptu invitation!
Serve 3 as a side
Ingredients
2 large zucchini, sliced lengthwise, then into 1/4 inch thick moons
1 Tbsp coconut oil
1/2 tsp cumin seeds
2 dried red chiles
1/4 tsp mustard seeds
1/4 tsp nigella seeds
1/4 tsp fenugreek seeds
1/4 tsp fennel seeds
1/4 tsp turmeric
1/2 tsp amchur (mango powder)
Juice from 1/2 lime
Pinch chile powder
Fleur de sel, to taste
1 cup cubed butternut squash (mine was already roasted)
Chopped cilantro for garnish
Directions
1.  Heat the oil in a wide heavy based pan (sautée pan).  Add the seeds and red chiles and cook for about 1 minute or until they crackle and sputter.  This mixture of seeds is called Panch Poran.  I like that name.
2.  Add the zucchini slices and stir to coat.  If your butternut squash is raw, add it as well.  If it is already cooked, wait until the end to add it.
3.  Cover and cook on high for 2-3 minutes.  During this time, the zucchini and squash will steam a bit while keeping some texture.
4.  Uncover and cook, stirring for another 3-4 minutes on high.  If your butternut squash is was already cooked, now is the time to add it.
5.  Add the lemon juice and mango powder along with a few pinches fleur de sel.  Stir and set aside until ready to serve topped with some chopped cilantro.

I served this with some Hara Moong Dal, Cabbage Sambharo, Turmeric Basmati Rice, and Rotis.

The whole deal was lovely but what I liked about this recipe is that the zucchini keeps its texture and does not melt down into complete mush.  Mr. Zucchini can be quite seductive when he puts his mind to it..

Print Friendly and PDF

Thursday, September 17, 2015

Fresh Mussels in a Spicy Tomato Sauce

After years and years of trying to either grow basil or keep a basil plant alive for more than 3 days, I finally conquered the challenge.
The secret?  I have absolutely no idea.
Maybe this time I tried to be careful to only pick the big leaves and leave the small leaves on the plant to develop.   Maybe this time I remembered to water it and put it on the window sill during the day and brought it in at night.  Maybe it's because I remembered to bring it in when it was too hot.. or put it on the south or east side of the house instead of full blast west as my previous living space faced.  Whatever the secret, I'm going to make it last as long as I can.  When those leaves start looking at me proudly and the plant is standing up straight, chest puffed out and shoulders back, I need to use them.  This is the type of deep deep inner desire that must be fulfilled quickly.  I'm always afraid to "waste" fresh basil by cooking it into dishes because it's so fragrant when raw and used as a topping that it can transform a dish.  I decided to go Cozze on it.
This is a repost of a Sicilian recipe I made after coming home from Italy,
Cozze alla Posillipo.
I didn't have clams this time.. only mussels, but they were big meaty mussels that perfectly filled my pleasure neurotransmitters to the maximum level.
This time I added 1 grated carrot to the sauce to help it become nice and thick.
I also added some freshly halved cherry tomatoes and chopped basil.
This is the type of dish I like to order when I'm out.  I know it's easy to make, but I never know if the seafood I'm buying is going to be good, so I only make it sparingly.
I'm recharged.. try to deplete me!

Print Friendly and PDF

Wednesday, September 16, 2015

Vegetarian Okonomiyaki - Japanese Pancakes

I very deeply believe that recipes come looking for me and not the other way around.  Social media may help with that, but as I scroll down looking for Bull Terrier pictures, I get flashes of beautiful things I had no idea existed.  These things take over my brain until I give in and recreate them my way.  Okonomiyaki is one of those things.  I thought I was familiar with Japanese cuisine, but seeing an image of this wonder made me realize that all I've ever experienced concerning Japanese food is what I've been able to try at restaurants.  I know absolutely nothing about Japanese street food.  Actually, the words "Japanese Street Food" never crossed my mind.  If I was asked what I thought it was, I would guess some teriyaki meat on a stick or things along those lines.  Now that I think about it, I'm pretty sure food on a stick is a big thing in Japan.
Anyway, this little treasure absolutely needed to be born of my hands.. and so it was..
Serves 4 (1/2 per person or 4 smaller pancakes)
Ingredients
3 eggs, beaten
1 Tbsp miso
160mL mushroom water (or broth or water)
100g flour
few tablespoons oil for cooking
300g shredded cabbage
2 large handfuls dried shitake mushrooms, soaked int hot water, then sliced
1 carrot, peeled and grated
2 Tbsp nutritional yeast
3 green onions, chopped
 Garnish:
toasted sesame seeds
picked sliced ginger
dried seaweed (I rehydrated mine)
sliced cherry tomatoes
Sauce:
sesame oil
thick dark soy sauce
glassy balsamic vinegar
Sriracha
Japanese spicy mayonnaise (I didn't have)
Directions
1. In a large mixing bowl, place all the vegetables until evenly distributed with each other.
2.  In a separate mixing bowl, whisk together the eggs, miso, water (I used the cooled water from the mushroom soaking), and flour.
3.  Pour the batter onto the vegetables and stir until all mixed together.  This should not be liquidy.. think hash browns.  Do not over mix, just coat.
4.  On a skillet or plancha, squirt a bit of oil and heat to high.  Divide the battered vegetables into 2 for mega Okonomiyakis or 4 for individual sized ones.  
I only had 2 medium pans.. this would be best on a large habachi style grill or plancha.  I did what I could to satisfy my urge.  I seriously thought I'd be making 1 per person, but it turned out to be a bit overwhelming in portion size.
Shape them into round pancake like things.
5.  Cook for about 3 minutes on high, then flip and cook on the other side for another 3 minutes.  I'm not a crazy person that tries to flip things in the air and catch them back in the pan.  If you are one of those.. go right ahead and give it a shot.  I covered the pan with a plate, flipped onto the plate, then slid the pancake back into the pan to limit the possible damage.
I also had 2 different pans, one stone and one ceramic.  The ceramic gave me a char and cooked quicker than the stone.  Interesting!
6.  Add your garnish, then try to make something pretty with all your sauces.
Serve hot or warm.. but not cold.  This is a right here right now type of thing.

The amount of cooking is very subjective and personal, but I enjoyed the charred one better than the custardish one.  It tasted more.. finished.
This dish is just as interesting to eat as it is to look at.  It's something completely customizable so there isn't really a fixed recipe.  The basics are that you need cabbage, need something meaty, need batter, and need need need toppings and sauce.  Crunchy toppings, fresh toppings, pickled toppings.. but toppings.  Sauce should be tangy, spicy, and a bit sweet.
Now I know why this Okonomiyaki spoke to me in the first place.  It is completely the way I let my desires develop in my the kitchen...

Print Friendly and PDF