Search this blog

Translate

Sunday, December 11, 2016

Tandoorified Cauliflower "Steak"

Does that mean you can make thick slices of cauliflower that don't fall apart and grill them?
I cannot believe how much diversity you can find in vegetables!  This is one of my many gifts this week.  But this one, I procured for myself.
(The other ones were indoor skydiving, a dinner cruise, and the new Steve n Seagulls album).
So, the only downside is that you can only make 2 "steaks" out of 1 cauliflower head.  The rest are just florets.. but I'll tell you what to do with those.. it's actually not really a problem.
Serves 2 steaks + 2 servings of florets
Ingredients
1 head cauliflower (mine was green cauliflower)
2 tsp tandoori spices
2 Tbsp olive oil
juice from 1/2 lime
chopped cilantro for garnish
Directions
1.  Make the slices.  Remove the outer leaves of the cauliflower head without cutting the stem.  Place it upside down on the cutting board, stem up (like a head stand) and slice right down the center of the stem to have 2 halves.. like a human brain.  Then slice each half once more, making a 1.5 to 2cm steak with each half.  The rest will break off as florets.  Keep those aside.
2.  In a saucer, stir the tandoori spices and olive oil together.  Brush this mixture generously all over the steaks.  Toss the rest of the mixture with the florets.
3. Take care of the florets.  Preheat the oven to 400°F 200°C.  Squeeze just a touch of lime juice over the florets, place them in an oven proof dish or sheet pan, making sure they are well separated, and bake for about 25 minutes.
4.  Now for the steaks.  Heat up your grill, plancha, or griddle pan to high heat.  Grill the steaks for about 2-3 minutes on each side, until they start to get grill marks.  Drizzle a touch of lime juice will this is happening.
5.  Remove from the grill/plancha/griddle and place in the oven.  I griddled on a cast iron skillet and just transferred the skillet to the oven.  Cook for about 15 minutes.  This will have the outside crispy and charge and the inside tender enough without being mushy.
This is perfection.
6.  Serve the steaks drizzled with lime juice and chopped cilantro.  The florets can be served the same way, but without the "steak" look.
I served mine with some Toor Dal, basmati rice, and some sauteed spinach.

Let me tell you about that spinach real quickly.
I took some nigella seeds (also known as black onion seeds) and threw them into some hot olive oil, then added some sliced garlic, and then threw in the spinach and cooked until it wilted.  Then I seasoned with a bit of fleur de sel and added 1 Tbsp dried pomegranate seeds for crunch.
I don't know where that idea came from, but it was a great idea and nicely complemented the rest.

So about those steaks.. there is something ultimately satisfying about tandoorifying vegetables.  The char marks from the grill give the veggies that superior dimension and tandoori spices complement that texture perfectly.
The result is eye-candy.. we rarely see the cross-section of cauliflower heads, nature is truly beautiful.

Print Friendly and PDF

Wednesday, December 7, 2016

Roasted Delica Morreti and Feta Quiche

Keep the skins on.
That's the secret.
The best squash varieties are by far Ms. Butternut and Ms. Delica, pictured blow.
 
Both can be held in one hand, do not need to be peeled if roasted, do not become mush when cooked, and have a distinct sweet flavor that is not watery or pumpkiny.
In 3rd and 4th place come Mrs. Bernettine and Mrs. Sucrine du Berry, pictured below. 
 They are both larger versions of the first two with the same qualities, but need to be held with 2 hands.  They are perfect for pie or larger families.
Ms. Red Kuri (Potimarron) is all the rage in France, and it is very tasty, but on my list, it comes 5th, pictured below.
Although it can be held in 1 hand, there is not much flesh and once cooked, it doesn't stay as firm as the others.  The distinct full flavor is less present as well.
I love my life.

So with this in mind, my full bodied Delica was cubed, skin on, brushed with olive oil and a pinch of fleur de sel, and roasted on a sheet pan with parchment paper for about 30 minutes at 400°F 200°C.
The rest is just a quiche with a garlic panko almond crust.
Ingredients
crust:
3 Tbsp panko (use something else if GF)
1 clove garlic, grated
pinch fleur de sel
few shakes red pepper flakes
few cracks black pepper
3 Tbsp ground almonds
1 Tbsp olive oil
the works:
1 cubed oven roasted Delica or something of the sort
1 onion, sliced into moons (preferably roasted with the squash)
100g feta, cubed
appareil:
3 eggs well beaten
3/4 cup milk
3/4 cup yogurt or cream
1/2 tsp dried thyme
pinch fleur de sel
pinch nutmeg
few cracks black pepper
Directions
1.  Make the crust directly in the baking dish by mixing everything but the olive oil together.  Then pour in the olive oil and spread out the mixture evenly in the bottom of the dish.
Pre-toast the crust by placing it in the oven at 400°F 200°C for about 10 minutes.  Remove the dish and get ready for the next step.
2.  Place the works into the dish, making sure to arrange everything to your liking.  The feta should be evenly distributed and not all clumped on one side.  Apply yourself.  This is easy.
3.  Make the appareil by beating everything together until foamy.  Pour this into the dish with all the other people waiting.
4.  Cook at 350°F 180°C for about 40-50 minutes.
5.  Remove and let cool.  This is important.  At least 15 minutes.  This is also the hardest part.  During this excruciating time, make a salad or something.

I served mine with a salad.
The skin?  Ha!
It makes it crispy and utterly enjoyable without clearly being identified as skin.
I shall never remove skin from any of the smaller squashes again!

Print Friendly and PDF

Sunday, November 27, 2016

Panko Crusted Coalfish Burger with Tartar Sauce

As I drift from the traditional all beef patty, pre-seasoned and char-grilled to perfection, I'm opening up to things I may never have tested before, as long as my OG burger was available.
It is unfortunate to cling to ideas of "The Perfect Burger" because you completely pass by opportunities to taste exceptional things such as Black Bean & Beet Burgers.. or my new best friend, this crusty Coalfish Burger!
So here's the thing with me and fish.  When it's whole, it's either on the BBQ/Plancha or in the oven.. whole.  That is the tastiest way in my opinion.  If I'm going to be cooking it in a pan.. there is no other way for me than crusted.
The crust is where it is all concentrated.  If you can get that right, you can make it any style you want, and be worshipped.  Indian style with curry leaves, mustard seeds, and coconut rice.  American style in a hamburger bun with tartar sauce.
Oh yes.
This crust is perfection in a bun.
Let me explain.

Serves 2
Ingredients
1 thick cut of fish (mine was coal fish, about 350g - 12 oz), cut in half
2 Tbsp olive oil
1 Tbsp butter

Crust:
3 Tbsp ground almond
1/4 cup panko
2 cloves garlic, grated
1/2 tsp fleur de sel
1/2 tsp freshly grated black pepper
3 Tbsp finely chopped parsley
1 tsp dill
1/4 tsp turmeric powder
1/4 tsp red pepper flakes
3 Tbsp grated parmesan

Tartar sauce:
1 plain yogurt
2 Tbsp dill
1 cloves garlic, grated
juice from 1/2 lime
pinch fleur de sel
1/2 tsp freshly cracked black pepper
1 shallot, diced
4 baby cornichon (tiny French pickles) diced
1 tsp cider vinegar

Directions
1.  Make sure your fish does not have any bones.  Remove them with tweezers if needed.  This is important.  You lose the "fun" of the burger if you don't do this.  Pat dry.
2.  Prepare the crust by mixing all the crust ingredients together.  Make sure to stir well so there are no clumps.  Put this on a small plate.
3.  Press the fish into the crust.  Make sure there is crust all over each piece of fish.  Press with your fingers if you must.
4.  Make the tartar sauce by stirring all the ingredients together.
5.  Cook the fish.  Heat the oil and butter in a stainless steel pan.  Place each piece of fish into this.  Do this on high heat.  Cook for about 2 minutes, then carefully flip, reduce heat, and cook for another 2 minutes.  Remove from heat and cover for about 1 minute (the inside will steam while you get all your burger things ready).  The cooking time will vary depending on the thickness of your fish.  The thinner it is, the quicker it will cook (and possible fall apart so get a thick piece).
Serve by slathering tartar sauce on each side of your toasted burger buns.  I put tomato, lettuce, and a roasted green chile in mine and served with some oven roasted fries.

This was perfection.  Crusty on the outside and tender on the inside.  The tartar sauce was tangy with some fresh crunch.
Look no further, we have found each other...
Welcome to my table, crusty fish burger!

Print Friendly and PDF

Saturday, November 26, 2016

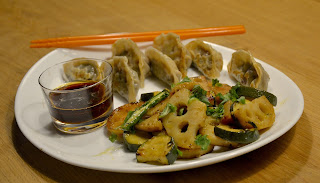
Juicy Vegetarian Potstickers with Lotus Root Stir Fry

I've made Vegetarian Jiaozi Potstickers before, and I preferred them to the standard meat-filled ones.  I've noticed this on several occasions.. the vegetarian ones are always more surprising.  No two veg jiaozi recipes will yield the same flavor, and that's the beauty of it... there are endless variations possible for equally delicious outcomes.
Since I've been in a cabbage mood this week, when I stumbled upon a cabbage mushroom filling, just the thought of that savory umami madness made me salivate, and off to work I was..

Ingredients
Potstickers: Yield 3-4 dozen dumplings, recipe from TheWoksofLife
3-4 dozen dumpling wrappers (mine were store-bought)
3 Tbsp oil
1 Tbsp grated ginger
1 onion, chopped
1 green chile, diced
2 cups (250g) shiitake mushrooms, chopped
1/4 head or cabbage, shredded (1 1/2 cups)
2 medium carrots, grated (1 1/2 cups)
1 cup chopped garlic chives (or leeks or scallions)
1/2 tsp white pepper
2 tsp sesame oil
3 Tbsp shaping wine
2 Tbsp soy sauce
1 tsp sugar
1 egg or 2 Tbsp oil
Dipping sauce:
1 tsp sesame oil
1 small clove garlic, grated
1 tsp Doubanjiang (broadbean and chile paste)
1 Tbsp black vinegar
1 tsp rice vinegar
juice from 1/2 lime
2 Tbsp soy sauce
few pinches sesame seeds

Lotus Root Stir-Fry: Serves 4 as a side
2 Tbsp oil
1 clove garlic, grated
1 tsp ginger, grated
1 slit green chile
1 lb (apport 500g) lotus root, sliced into 1 cm pieces and placed in a bowl of water
1 large zucchini, halved lengthwise, then sliced into 1 cm pieces
1 tsp sesame oil
1 Tbsp soy sauce
1 Tbsp black vinegar
1 tsp sesame seeds
chopped cilantro for garnish

Directions
1.  Make the potsticker filling.  Heat the oil in a wok or heavy based pan and add green chile and grated ginger.  Cook until fragrant, then add the onion and cook until translucent.  Add the mushrooms and cook, stirring for about 10 minutes on medium heat, until the mushrooms have released their liquid and it has mostly evaporated.  Add the cabbage and carrots and cook, stirring until tender.  This should take about 5 more minutes.  Remove from heat, stir in the chives, pepper, sesame oil, shaking wine, soy sauce, and sugar.  Set aside and let cool.
2.  While the filling is cooling, make the dipping sauce.  Stir it all together and set aside.
3.  Go back to your filling.  You want it to be cool enough to handle.  Stir in the last Tbsp of oil.. or egg.  I used egg because I thought that was a bit too much oil.  I don't regret my choice.
4.  Get wrapping.  Dip your finger in some water and run it along one edge of the wrapper.  Place about 1 tsp of filling in the center of the wrapper, then fold in half and seal by making pleats or ruffles with the side of the wrapper your ran your wet finger on.
Ok, it's kind of hard to explain.  Here's a video that shows the movements.  I did the crescent moon one.  Place them on a floured surface while you finish doing the rest.
5.  Make your stir fry.  Drain the lotus root slices from the water.  Heat the oil in a wok and add the slit green chile, garlic, and ginger.  Cook until fragrant, then add the lotus root slices.  Cook, stirring for about 5 minutes, then add the zucchini slices.  Cook, stirring for another 5-10 minutes, depending on how crispy you like your veggies.  Deglaze with some soy sauce.  Remove from heat and stir in the sesame oil, black vinegar, and sesame seeds.
6.  Cook your potstickers.  In a large flat pan, brush a bit of oil.  Place the potstickers one by one in the pan, making sure they do not touch each other.  Do this in batches if needed.  Let fry for about 1 minute, then add 1/4 cup water, cover, and let steam until the water evaporates (about 2 minutes).  Set aside and repeat.
Now your "hard work" may be rewarded.
Serve as many potstickers per person as desired with a bit of dipping sauce and a serving of stir fry garnished with chopped cilantro.

I only had 25 wrappers, so I ended up with quite a bit of leftover filling.
This was not a problem.. I served it over rice the for leftovers but could have easily worked it into an omelet or stir-fried with rice noodles.
Each day is a new day..

Doesn't it feel good to have magic in your fingertips?

Print Friendly and PDF

Wednesday, November 23, 2016

Cardamom-Roasted Red Kuri Squash with Marinated Limes and Black Chickpeas

I love squash season.
It makes me happy.
I also love that you can eat the skin.
I just discovered this.  When it is well roasted, most squashes skin is edible, and even quite enjoyable!
Since this discovery, I've making a squash dish once a week.  Actually, I had already been making weekly squash dishes, but this makes it so much more exciting for me.  No tough peeling!
Lucky for me, there is a whole chapter on Squash in Ottolenghi's Plenty.  This one is mostly his recipe, but I added some sweetly spiced black chickpeas and some quinoa to make it a filling meal.  If those are left out, this can be an appetizer.

Plenty, page 65
Serves 4
Ingredients

Roasted Squash:
1 red kuri or butternut squash, seeded and sliced int 1-1.5 cm thick slices, skin on
2 Tbsp cardamom pods, powdered with a mortar and pestle, pods removed
1 tsp allspice
3 Tbsp olive oil
few pinches fleur de sel

Marinated lime:
2 limes
1 Tbsp olive oil
pinch fleur de sel

Tahini Yogurt Sauce:
1 greek or plain yogurt
1 Tbsp tahini
1 Tbsp lime juice
2 Tbsp water

Topping:
2 sliced green chiles
handful chopped cilantro
crumbled feta

Black chickpeas (not from Plenty, this is my own thing):
1 cup dry black chickpeas, soaked overnight
1 star anis
2 black cardamom
1 green cardamom
1 bag black tea
2 dried red chiles
1 inch piece cinnamon
1 tsp black peppercorns
2 Tej Petta (Indian bay leaf)
1 tsp salt
6 cups water

Directions
1.  Place all the "Black chickpeas" ingredients in your slow cooker and cook on low for at least 7 hours.  This is very hands off.  If you don't have a slow cooker, cook in a pressure cooker under pressure for 15 minutes, opening only after cooling.  Otherwise, simmer stovetop for 1 hour and 15 minutes.  This is why I love my crockpot.
2.  Whenever you feel ready, preheat the oven to 210°C 410°F.  In a small dish, mix the powdered cardamom, allspice, olive oil, and salt together.  Brush this mixture onto the squash slices and place on a baking sheet with parchment paper.  Cook this for 20 minutes or until tender when poked.  This doesn't need to be served piping hot.  It's actually better warm.
3.  While that is happening, make the marinated lime.  Trim off the tops and tails of the limes, stand them on a cutting board, and cut the skin off following the natural curve of the fruit.  This should remove most of the bitter white part as well.  Then quarter the limes from top to bottom and cut each quarter into 1-2 mm slices.  Place these slices in a small bowl with the olive oil and fleur de sel.  Set aside.
4.  Make the tahini-yogurt sauce.  Whisk together the yogurt, tahini, and lime juice.  The tahini should tense up, but then relax.  Add water as you stir.  If the sauce is too thick, add a bit more water. You should be able to pour it.

To serve, I put some quinoa and some of the drained black chickpeas in the plate, then arrange some of the roasted squash slices over it all, spoon some of the lime slices with their juices, and scatter the garnish of sliced fresh green chiles, cilantro, and feta.

This seems like so much, but really is hands-off except for the sauces and lime.  The oven and crockpot do most of the work.  The stove-top only had quinoa going, and the rest was just lingering cooking time.
I like using the full potential of my equipment.  It makes all the "hard work" looking types of meals like this one so effortless, but so beautiful.  The textures of all the combination of elements is surprising with each bite.  This is hands down state of the art.  I would have dedicated a chapter of my life to squash as well.  As would any brilliant person.
There is something about that orange color....

Print Friendly and PDF

Wednesday, November 16, 2016

Leek Fritters with Cilantro Garlic Dressing

Whenever I buy leeks, I never know ahead of time what to do with them.  It always reminds me of a woman I met in a grocery store in Florida while doing my weekly shopping.  I grabbed leeks, and she looked at me with awe and admiration and asked,
"What in the world can you do with those?"
This made me smile inside and out, because I love to share food knowledge with anyone willing to chat with me, and I'm usually on the receiving end of the knowledge, so being on the giving end made my heart warm.
I don't remember what I told her exactly, but I must have given her examples (stew, slice and sautée, use the greens, etc..)
That day, the woman bought leeks for the first time in her life, and I really hope she enjoyed them, because leeks are fabulous.  They are like giant sweet green onions.  No, they aren't like them, they are them.  They pair superbly well with seafood, but they also pair extremely well with themselves!
Naturally, as I cook my way through Plenty, I knew this recipe would be another lesson in life.  The funny part is, as I was cooking, I was reminded of the method of Japanese Okonomiyaki.  This is really like a Mediterranean version of the Japanese pancake.. with a bit of egg snow genius, of course.  Brilliant, as usual.

From Yotam Ottolenghi's Plenty, Funny Onions page 36.
Yield 8 "burgers"
Ingredients

Main Event:
2 Tbsp olive oil
3 leeks, trimmed and sliced into 2 cm slices
5 shallots, diced
few pinches fleur de sel
cracked black pepper
1 fresh red chile, seeded and diced
handful chopped parsley
3/4 tsp coriander powder
1 tsp cumin powder
1/4 tsp turmeric (I used freshly grated)
1/4 tsp ground cinnamon
1 tsp sugar (optional and totally unnecessary)

Batter:
2 eggs, whites separated
150 mL (5 fl oz) milk
30g melted butter
120g (4.2oz) self rising flour (I used normal + 1/2 tsp baking soda)
1 Tbsp baking powder
enough olive oil to cook the patties

Cilantro Garlic Dressing:
1 plain yogurt (125g or 4.4oz)
1 handful fresh cilantro
1 handful parsley
3 cloves garlic
juice from 1/2 lime
pinch salt
cracked black pepper
drizzle olive oil
Directions
1.  In a wide heavy based pan, heat the oil and sautée the leeks and shallots with a few pinches fleur de sel and some cracked black pepper.  Cook, stirring on medium heat for about 15 minutes or until tender.
2.  Transfer to a large mixing bowl and stir in the rest of the "main event" ingredients.  Let cool.  You don't need it to cool down to cold, but you don't want it so hot that the batter cooks as you mix it in.  
3.  While you are waiting for the main event to cool, make the dressing.  Blend the dressing ingredients together.
There, you're done with that dressing.  That took about 3 seconds.
4.  Make the batter.  In a separate mixing bowl, beat the egg yolks with the melted butter, then beat in the milk until homogenous.  Add the flour and baking powder and beat well.
5.  Pour this part of the batter into the bowl with the leeks and stir to incorporate.
6.  In another bowl, make snow with the egg whites.  Or to be less poetic, beat them stiff.  Carefully fold this into the leak and batter mixture.  This is the secret weapon part.
7.  You are ready to cook the patties into fritters or burgers or pancakes or whatever you want to call them!
Heat about 2-3 Tbsp olive oil in your wide heavy based pan and spoon the leek mixture into approx 4 large patties.  These should be burger sized (not oversized burger, but to give an idea).  Cook them for 2-3 minutes on each side or until golden and crisp.  Remove onto paper towels and keep warm while you do the next batch, adding oil each time.

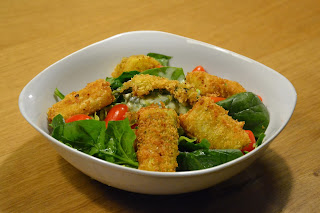
I served mine over some salad and baby spinach with daikon and sweet potato fries, drizzled with the dressing.

This was such a lovely creation.  It was a huge success.  The texture was crispy on the outside, creamy on the inside, full of spice with a bite of garlic in the dressing.
This is real art.

This would do well as an appetizer in smaller "patties" dipped in the dressing as finger food as well.  It is actually so versatile I've been eating it for 3 days and I'm still not tired of it.
Pair it with pasta, with chickpeas, with tomato salad... dream of it, have the aroma follow you to work, look at the remaining patties longingly.. plan to make it again..

Print Friendly and PDF

Sunday, November 6, 2016

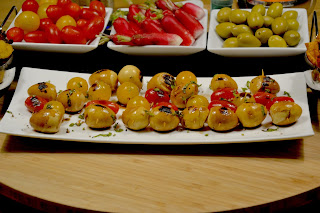
Griddled Marinated Quail Egg Skewers with Basil Salt

So apparently, you can give a woman a fish, and she'll feed you for a day.  Teach a woman how to fish, and she'll feed you for a lifetime... until there are no more fish to be caught, and she'll have to teach her how to dig up mushrooms.
Oh man, that started out nicely but I killed it.
Besides the overfishing bit, I believe this to be true.  These marinated eggs are the result of a certain method of fishing I learned earlier this year.  The fishing lesson was Asian Style with dark soy sauce, and my new creation is Balsamic & Olive oil with Basil salt.
I never would have imagined doing this to quail eggs if it wasn't for that very first discovery, so thank you Yotam for releasing your genius in me.
Griddled marinated cherry tomatoes are also the bomb.  Thank you, Me.
Makes 18-24 skewers (depending on how many quail eggs are packed together)
Ingredients
pack of fresh quail eggs
1 cherry tomato per quail egg
toothpicks for skewers
Marinade:
3 Tbsp balsamic vinegar
juice from 1/2 lime
1 Tbsp olive oil
pinch salt
Topping:
6-7 leaves fresh basil, finely chopped
few pinches Pink Himalayan Salt or other special salt
few cracks black pepper
Directions
1.  Soft boil the quail eggs.  To do this, I placed them in my steamer basked and steamed on high heat for 3 minutes, then let them cool before peeling.  They were perfect.. not too liquid, but velvet cream style.
2.  Make the marinade by mixing the balsamic vinegar, lime juice, salt, and olive oil.  Make the skewers by placing 1 egg and 1 cherry tomato on a toothpick.  Place the skewers in the marinade.  Let marinate for at least 1 hour.
3.  Get ready to grill.  I  used my stovetop griddle pan.  Drain the eggs from the marinade and place on the very hot griddle pan for about 1 minute, making sure to turn them at least once so they get the char marks on 2 sides.  Don't discard the marinade.  Use it on a salad or drizzle it on some grilled veggies.  Don't be wasteful.  Balsamic vinegar is delicious.
4.  Top with some cracked black pepper, pink Himalayan salt, and finely chopped basil.  Don't use table salt.  If you don't have Himalayan salt, use another specialty salt or at the very least, fleur de sel.  You don't want this to have an overly salty taste  but you want it to have texture with the special salt.
Serve at happy hour or as an appetizer.

The marinade was not as strong as the Asian style griddled eggs, but the slight balsamic hint of flavor was definitely there, and much appreciated by my tasters.
This works out so perfectly because you can really taste the grilled part.  The slight char marks make a big difference in taste and texture.  This really is a fool-proof situation here.
I love the bite size-ness of quail eggs and I LOVE that they are easy to find here.  This would transfer well on large skewers on a bbq with other things as well.

Print Friendly and PDF

Wednesday, October 19, 2016

Crispy Leeks with Tangy Yogurt Caper Dressing

Of all the things I could have dreamed of making with leeks, never would I have thought to bread and crisp them.
Cooking my way through Plenty is like following the path less traveled on.  It makes so much sense.  Why wouldn't I bread and crisp leeks?  This man is brilliant.
Adapted from p. 42 of Ottolenghi's Plenty 
Serves 4 as a salad topping or appetizer
Ingredients
3-4 leeks, whites, cut into 5 cm parts
3-4 serrano chiles (optional)
150 mL sunflower oil for frying
Breading:
1 cup panko crumbs
1 tsp coriander powder
1/2 tsp turmeric powder
1/2 tsp chile powder
few cracks black pepper
1/4 tsp fleur de sel
1 egg, beaten
Dressing/Dipping sauce:
juice from 1/2 lime
1 1/2 Tbsp capers
2 small green onions, sliced thinly at an angle
2 - 3 Tbsp yogurt
1 1/2 Tbsp olive oil
pinch fleur de sel
few cracks black pepper
Directions
1.  Bring a large pot of salted water to a boil, then add the leek pieces, reduce the heat, and simmer for about 15 minutes.  You want the leek pieces to be tender, not mush.. but not hard either.  Drain and pat dry (or let dry).
2.  While the leeks are blanching, prepare the breading stand.  Mix all the breading ingredients except the egg together on a plate.  In a separate bowl, have the beaten egg ready.
When the leeks are dry, dip each piece into the egg, then roll around in the breading.  I added 4 serranos from my garden in this step.
3.  Heat the sunflower oil in a sautée pan on high and fry each breaded leek piece for about 30 seconds on each side.  You may need to do this in batches.  They should be nice and golden.  Do this with your serranos as well.  Set aside onto paper towels.
4.  Make the dressing or dipping sauce.  Stir all the ingredients together.
5.  Serve as finger appetizers or as a salad topping.
I did both.  I couldn't help it.
Once salad, and then the leftovers were finger food appetizers.

The texture is insane.  Crunchy on the outside, creamy on the inside, hot vs cold sauce.  The dipping sauce has that tang that pairs perfectly with the crunch.
This will be making an appearance at my next happy hour evening... and I'll make people guess what they are.
Oh and the serrano?  Best decision I've made all week!
This is delicious beyond words.. why didn't I think of this myself?

Print Friendly and PDF

Wednesday, October 12, 2016

Butternut Squash Couscous

When I read reviews about Ottolenghi's recipes, I see many people are put off by the number of ingredients.  I find that funny because most of his recipes are things I can make without going shopping for extras.  A well stocked spice drawer (or spice room) is the key to being spontaneous.  Plus, many things can be exchanged without altering the heart of the recipe.  Don't have parsnips?  Who cares, use a different vegetable or extra carrots.  Don't have dried apricots?  Use dried figs or raisins.
Serves 4-5
Ingredients
2 carrots, peeled and chopped into chunks
8 shallots, peeled but left whole
2 cinnamon sticks
4 star anise
3 bay leaves
4 Tbsp olive oil
1/2 tsp ground ginger
1/4 tsp ground turmeric
1/4 tsp hot paprika
1/4 tsp chile flakes
1 small butternut squash, peeled, seeded, and chopped into chunks the same size as the carrots
1 zucchini chopped into chunks (original uses parsnips)
1-2 whole serrano chiles
1 handful dried raisins (original uses dried apricots)
200g (7 oz) cooked chickpeas (I cooked mine in the crockpot)
35-40 cL (11-14 floz) chickpea cooking liquid or water
1 Tbsp olive oil
1 1/2 cups dried couscous
large pinch saffron threads
1 1/2 cups boiling vegetable stock
1 Tbsp butter or more olive oil
1-2 preserved lemons, pulp removed and skins finely sliced
harissa and chopped cilantro for garnish
Directions
1.  Place the carrots, shallots, serrano peppers, cinnamon, star anis, bay leaves, 4 tbsp oil, few pinches salt, and all the other spices in a large baking dish.  Mix well and bake at 190°C 375°F for 15 minutes.
2.  Add the butternut squash and zucchini to the baking dish, stir well, being careful not to break the pepper, and bake for another 40 minutes.  The vegetables should be slightly tender.
3.  Add the chickpeas with their cooking liquid along with the dried raisins, stir well, and cook for another 20-25 minutes.  It should start to smell amazing.
4.  About 15 minutes before serving, place the couscous in a heat safe bowl that can be covered.  Drizzle a pinch of salt, a bit of olive oil into it and add the saffron threads.  Pour the boiling vegetable stock onto the couscous, then cover and let sit for 10 minutes.  The couscous will drink up the saffron infused water.  Open and add a pad of butter or a more olive oil and fluff with a fork.

Serve the couscous with the baked goodness topped with some preserved lemon slices topped with some harissa hot sauce and chopped cilantro.
That roasted serrano pepper went onto my plate.  It was divine intervention.

This meal was full of pleasant flavor.. the cinnamon and star anise make a nice fragrant broth that infuses the vegetables.  The butternut squash and shallots are nice and sweet, the chickpeas roast a bit while being heated by the fragrant broth.
Partaking in this feast was like breathing in Love..

Print Friendly and PDF

Sunday, October 9, 2016

Mixed Vegetable Korma

This weekend, I needed a taste of India.
Fresh curry leaves have been located somewhere in Lyon, but I don't know exactly where... all I know is they made their way into my hands.
For as long as I have been cooking Indian food (which means a reasonable number of years) I've been longing for curry leaves.  When I first went to India I tried to source some but I didn't know what to call them in Hindi.  Now I know, it's Kadi Patta.  But over there, they sold me Tej Petta which I later figured out are bay leaves.  I thought all was lost when I finally discovered the Indian supermarket in Lyon where they (sometimes) carry dried curry leaves in little baggies.  After cooking with them for the first time, I became enamored.  They add such a distinct flavor to daals and vegetable stir fries, they're almost like a secret ingredient, unable to be replaced or substituted.  They were my little best kept secret... until I was told that they were seen fresh in town.
Fresh curry leaves?  But they grow only in hot climates and only stay fresh for a few days!  How can this happen in Lyon?  Everyone I know that cooks with fresh curry leaves doesn't buy them.. they grow them.. in India, California, and Malaysia.. never in France.
So when they were gently handed to me as proof that when you really long for something, it becomes reality, I may have concealed my happiness in order not to make a scene in public.
This offering surpasses all others.
This offering is more than just a thing, this is the deepest understanding of my desires.
Thank You.
Inspired by VegRecipesofIndia
Serves 6-7 as a side
Ingredients
Spice paste:
1 inch piece cinnamon stick
2 cloves
1 tsp fennel seeds
1 green cardamom
1/2 Tbsp coriander seeds
2-3 dried red chiles, deseeded
1 tsp poppy seeds
6 Tbsp grated coconut
6-8 cashews
1/2 Tbsp chickpea flour
4 cloves garlic, chopped
3/4 inch piece ginger, grated
1/2 cup water for grinding
Korma:
3 Tbsp oil
1 onion, chopped
1 tsp freshly grated turmeric
2 sprigs fresh curry leaves
spice paste
1 carrot, peeled and chopped
1 large tomato, diced
2 large handful fresh green beans (about 1 cup), tailed and cut in half crosswise
1 handful snap peas
1 1/2 cups cauliflower florets
1 red bell pepper, sliced
1 cup water
2 Tbsp yogurt (optional)
salt to taste
chopped cilantro for garnish
Directions
1.  Make the spice paste.  Dry roast the cinnamon, cloves, fennel, cardamom, coriander seeds, chiles, poppy seeds, and cashews until fragrant, then add the coconut, and chickpea flour and dry roast a few more seconds.  Transfer to a blender with the rest of the spice paste ingredients and grind into a thick paste.  Set aside.
2.  Prepare the Korma.  Heat the oil in a wok or heavy based pan, then add the onions, turmeric, and curry leaves.  Cook until onions are translucent.
3.  Add the spice paste and fry while stirring, making sure it doesn't burn.  
4.  When the oil starts to separate, add the carrots, tomatoes, and 1/4 cup water.  Cover and simmer for about 10 minutes.
5.  Add the rest of the vegetables along with a few pinches of salt.  Cook on medium heat, stirring for another 15 minutes.  Add water as needed.
6.  Before serving, stir in 2 Tbsp plain full fat yogurt.  This step is completely optional and only adds decadence to the dish.  It is perfectly delicious without the yogurt.  Heat through, then remove from heat.
Serve hot or warm topped with chopped cilantro.

I served mine in a thali along with some saffron basmati rice, toor daal, rotis, and some whole roasted tandoori chicken.
Now I just need to get the intel on where exactly to find these next time... for everyone has their secrets and this one was not shared with me...

Print Friendly and PDF

Saturday, October 8, 2016

Caramelized Garlic Tart from Plenty

As I leaf through Ottolenghi's Plenty and marvel at the way his mind works, I stumble upon something that makes me react out loud, the "Funny Onions" chapter.  The more I read the introductions and the compilations of his recipes, the more I realize that this is the real way to compose.  I tend to focus one one ingredient that I want to make shine, and then create the recipe around that one ingredient, with other vegetables used to elevate the importance of the initial ingredient.  So the "Funny Onions" chapter is all about making bulbs sublime.  This speaks to me, for I am a garlic and onion lover.. sometimes I don't know which to choose, so I use both.  I love shallots, and can easily cook them whole and eat them as a side, for they sweeten when cooked.  I love fennel bulbs, raw or roasted, paired with just about anything.  Never in my mind had I ever thought of making a garlic tart.  Onion tart, yes.. onion soup.. yes, but Garlic Tart?  You mean a pie full of garlic?  What a genius idea!
This tart has almost 3 whole heads of garlic in it.. but it is relatively mild, since the garlic is left whole and par-boiled, then caramelized.  The result was mind blowing.  Mild, slightly sweet, and most importantly, making the garlic shine like the star she really is.
Adapted from page 38 of Plenty.
Serves 6-8 as an appetizer
Ingredients
1 rosemary paprika buckwheat shortcrust (original uses an all butter puff pastry)
2 1/2 heads garlic, separated and peeled (original uses 3)
1 Tbsp olive oil
1 tsp balsamic vinegar
1 cup water
3/4 Tbsp sugar
1 tsp chopped rosemary
1 tsp chopped thyme
150g cubed feta (original uses 2 different goat cheeses)
1 handful roasted cubes butternut squash (not in the original recipe..I had leftovers)
1 large handful cherry tomatoes (not in the original)
2 eggs
200mL yogurt (original uses double cream and creme fraiche)
salt and cracked black pepper
Directions
1.  Place the shortcrust or puff pastry in a 28cm fluted tart tin over parchment paper, lightly stab it with a fork, and cover the edges with foil.  Pre-bake it for 15 minutes at 180°C 360°F.  In a lower oven rack, place the cherry tomatoes so they can get a head start and lose their water.
2.  Make the caramelized garlic.  Place all the garlic cloves in a saucepan and cover with water.  Bring to a simmer and blanch for 3 minutes.  Drain, but reserve 1 cup of the water.
3.  Dry the garlic and the sauce pan, then heat the olive oil and the whole blanched garlic cloves on high heat.  Fry for around 2 minutes, then deglaze with the balsamic vinegar and garlic water.
4.  Bring to a boil, then simmer gently for 10 minutes.  Add the sugar, rosemary, and thyme along with a pinch of salt.  Leave to simmer until the garlic cloves are coated in a dark syrup (around 10 minutes).  Set aside.
5.  Assemble by placing the feta cubs into the pre-baked crust along with the butternut squash cubes and blistered cherry tomatoes, then add the garlic cloves and their syrup, making sure to spoon it evenly all over the other vegetables and cheese.
6.  In a separate bowl, make the custard by beating the eggs until frothy, and then adding the yogurt and beating well.  Add some salt and pepper to this mixture before pouring it into the crust over the rest, making sure to fill the gaps but can still see some veggies and cheese over the surface.
7.  The recipe says to bake at 160°C 320°F for 45 minutes, but after 1 hour, mine was still not done, so I turned it up to 170°C 350°F for 20 more minutes.  You want the custard to have set and the top to be golden.  By this time the house smells so lovely you just can't handle it anymore.. you just want to dive into the oven and swim through all that magnificent caramelized garlic.
8.  Let cool at least 20 minutes.  You can do it!
I served mine with a crunchy salad of baby romaine, shredded cabbage, chickpeas, lime, cilantro, and olive oil.

So.. how did it taste?  That first bite is transcending.  It's crunchy from the caramelized garlic that crisped in the oven and creamy on the inside.  The sharpness of the feta mixed with the tang of the oven roasted cherry tomatoes dance as if to thank you for having elevated them to this high ranking status.
That tart is honored to be your guest.  This is genius at its best..

Print Friendly and PDF

Thursday, October 6, 2016

End of Summer Garden Spaghetti

There's something romantic about picking the vegetables and aromatics from your own garden and eating them the very same day.
The fresh taste of each tomato, eggplant, bell pepper, and chile slice becomes gourmet.. with very little need to adorn.
I used about 5 baby eggplants, quartered them, sautéed them in some olive oil with a sliced up serrano, then added some garlic slivers, a sprig of rosemary, 2 sliced bell peppers, a bowl full of cherry tomatoes, and about a cup of leftover cooked chickpeas. 
In another pot I boiled some spaghetti died with squid ink, reserved about 1/2 cup of the pasta water, drained, then tossed it all with a generous filet of olive oil from Nyons.  I added that pasta water back in to make it saucy.
And all it needed at this point was some black pepper and a sprinkle of pink Himalayan salt, topped with fresh basil.
The only thing NOT from the garden or somewhere sexy was the spaghetti and the chickpeas.
Even the olive oil was special.
I've been making this with different variations of pasta all summer long.
This one was the most beautiful.
Perhaps it is the last until next summer...

Print Friendly and PDF

Friday, September 30, 2016

BBQ Butternut Squash

So the last time I fired up my grill, I decided to slice up my butternut, splash it with olive oil, paprika, and fleur de sel, and throw it on the grill.
I wasn't sure what I was thinking, or if it would be worth sacrificing an entire butternut squash, 
but I'm so happy I did.
This was a pleasant surprise.  I grilled it about 20 minutes, moving the slices around regularly, and when they each had some nice char, decided they were done.
Their natural sweetness caramelized right in front of my eyes on the bbq.
Even the picky ones loved it.. it's a win-win situation.

Print Friendly and PDF

Thursday, September 29, 2016

The Seppia of my Life

 Words cannot do this justice.
One must experience this to fully understand the meaning of life.
Cuttlefish, Seiche, or Seppia, however you like to name it, is my all-time favorite living being to enjoy grilled on the plancha.  Whenever I can get my hands on some fresh ones or have it at a restaurant, you can bet it's going to be in my belly.
This is the first time I've cooked such a big one.  The plate shows only half of it (because I unfortunately had to share) but it was a beauty.
The preparation is methodic, but each step gets me more excited until the very first bite where all I can feel is total bliss.  This is powerful stuff.  It pushes my serotonin button and makes my eyes roll back.
The best part is I finally picked my first of 3 beef heart tomatoes to join me in my nirvana-state.
They were perfect.  Just lightly seasoned with Himalayan pink salt, some pepper, and garden parsley.
Oooh!
So how do you prepare Cuttlefish?
Well, you can have your fish monger clean it and remove the skin (which is easier).. or, you can do it yourself... just be careful not to poke your knife into one of the eyes or it will squirt everywhere and might disturb the moment.
The important part is to remove the bone (or plume) and eyes, then pull the skin off and you're done.
For the plancha:
If it is a large one like mine, cut the body in half to make 2 steaks, and score each side diagonally with a knife.
Rub some grated garlic, hot pepper flakes, fleur de sel, and black pepper all over it, then drizzle with olive oil and let it marinate until you're ready to grill (while you're preparing the rest of your sides).
Then, when the plancha or griddle pan is hot, cook it while pressing down (because the sides will curl up) for about 2 minutes on each side.  You should see some nice grill marks.
Then remove and squeeze some lime juice on it and it's ready to go.
Mmmm.. look at that beauty.  I spoke to it at the store before, on the ride home, and while I was preparing it.
It sacrificed itself for me, and I am every so grateful for having experienced this moment...

Print Friendly and PDF

Sunday, September 18, 2016

Fermented Agua de Jamaica

This summer has been all about the fizz.  Anything sparkly, spicy, or fermented has been floating my bubble.
After successfully creating my ginger bug (which is still active and stubborn and just won't go to sleep), I've been regularly making ginger ale along with other fermented sodas.  I only have 3 glass flip top bottles, so it's not a major production, but it's nice since the quantities are 75cL to 1L at a time, there is a constant rotation of things happening in and around my kitchen.
Only once has the test been horribly awful.  Watermelon soda was really bad.  Really really bad.  Maybe I don't put enough sugar in, but it tasted like rotten tomato juice.  
I'm shuddering just thinking about it.
The sugar thing is psychological.  I know it will be eaten by the lactobacillus and won't actually make the drink sugary.. but it's a real struggle to do it.
Lemonade works really well, though.  Lets focus on the delicious.
Agua Fresca de Jamaica also turns out to be fabulous!  I've often thought that refreshing spiced hibiscus iced tea would be excellent as a bubbly drink...and so it was!
yield 75 cL (25 floz)
Ingredients
1/4 cup ginger bug
1/4 cup lime juice
2 Tbsp dried hibiscus flower
1/2 inch piece cinnamon stick
3 - 4 cups water
1/4 cup sugar (or more if you like it sweet)
Directions
1.  Place 3 cups of water with the sugar, hibiscus, and cinnamon in a pot.  Bring to a boil, then simmer for 2-3 minutes until sugar dissolves.
2.    Let cool to lukewarm.  This is important.  You don't want to kill your ferment.  Then remove the solids (hibiscus and cinnamon)
3.  Using a funnel over your flip top bottle,  pour in the ginger bug and lime juice followed by the steeped jamaica.  Top off with extra water if needed.  Make sure not to overfill.
4.  Do not close the bottle yet.  Cover to make sure nobody falls in.  I used a piece of coffee filter and a rubber band.  Let sit at room temperature for 2 days.
5.  Now you can close the flip top bottle.  Let sit for 1-2 days, but not more than that.  My room temperature is around 25°C 77°F right now.  If it's colder where you are, you may let it sit longer, but at your own risk.
6.  Refrigerate until ready to drink.
As always, open with caution.  Do this outside or as shown in the sink.  That is not my hand, by the way.
Hold the flip top cap down and let the air out slooowwwly to avoid the geyser effect.  This method functions well.

Enjoy very cold while discussing fermentation techniques with people who had no idea this could be done!

Print Friendly and PDF

Friday, September 16, 2016

Rainbow Tomato Salad

Let me take a moment to share my love for my fellow gardeners who selflessly offer their bounty to me.
Thank you for these extraordinary tomatoes.
I can never get enough of homegrown tomatoes.
NEVER!
The offering included some pineapple tomatoes (the yellow ones), green zebra tomatoes, beef heart tomatoes, and roma tomatoes.
Not only were they full of flavor, sweet, and juicy, but also a beautiful parade of colors and shapes to feast your eyes on...

So, the purest way to enjoy these juicy colorful jewels from the vine is in a simple salad with some olive oil, a bit of cider vinegar, shallots, parsley, feta, and some black pepper.

Print Friendly and PDF

Wednesday, September 7, 2016

Extra Dark Chocolate Brownies

Interestingly enough, I have never in my entire life been a brownie baker.  I've been a brownie eater, but I'd never ventured into that domain before.  Until, that is, brownies were requested from me.
It is hard for me to not fulfill a request related to food.  Especially when that request is for something American, Indian, or Mexican.
So I took on the request.. it really can't be that complicated to make brownies, right?
Well, it depends how you like them.  There are 3 categories of brownie preferences:  cakey, chewy, or fudgy.  The ingredients and cooking times will depend on what you are going for.  My requester obviously had no idea what I was talking about, so I first tried a cakey recipe.  My first try was awful.  I mostly followed the recipe, but I must have overcooked them.  Plus, I realized that my requestor was not a cakey fan.  That one didn't make the cut.
Then I found this one.. a nice fudgy heaven using cacao powder.. meaning REAL chocolate.  The result is absolutely perfect.  I did reduce the sugar a bit because 250g seemed a bit much.  This is one I will be making over and over with different variants (candied ginger instead of chopped chocolate).  It got a thumbs up from every person who tried them.  I never need to search for a brownie recipe again.  This is the ONE.
Borrowed from InspiredTaste.
Ingredients
145g (10 Tbsp) butter
200g (1 cup) sugar
65g (3/4 cup) 100% cacao powder
1/4 tsp sea salt
1 tsp vanilla extract
3 Tbsp ginger powder
2 large eggs
70g (1/2 cup) flour
75g (2.6oz) chopped dark chocolate (or chocolate chips or nuts)
Directions
1.  Place a mixing bowl on top of a pot of simmering water and melt the butter, sugar, and cacao powder while whisking.  This will help it melt gently without burning while nicely infusing the butter with the chocolate.  Set aside to cool.
2.  When cool, stir in the salt, vanilla, and ginger powder and mix well.  I used a wooden spoon.
3.  Drop the eggs in one at a time, beating well each time.  The mixture should go from grainy to glossy, but still nice and thick.  Beat this mixture very very well.
4.  Gently stir in the flour until fully incorporated, then stir in the chopped chocolate or nuts.
5.  Line a baking dish with parchment paper.  Mine was 20 x25 cm (approx 8x10 inch).  The smaller the dish, the taller the brownies. The inverse is also true.  Scrape the batter onto the parchment paper and level it out as much as possible.
6.  Bake at 165°C 325°F for 20-30 minutes.  Mine took exactly 25 minutes.  This may depend on the size of the dish.  Check it after 20 minutes.  A toothpick in the middle should come out almost clean.  The top should be crinkly.  That's good stuff.
7.  Let cool all the way before slicing.
I sliced too soon, but that's ok.
The sugar can probably be reduced to 180g.
The best is to pop in the fridge until cold enough to slice and peel off the parchment paper.. otherwise.. it is a delicious gooey mess and you'll have more on your fingers than in your portions.
This freezes and defrosts very well, too, from what I've heard, but they don't last long enough in this house for me to try that out...


Print Friendly and PDF

Monday, September 5, 2016

Garden Tomato and Eggplant Cake Tatin

Living off the fatta the land..
My baby eggplants are just starting to yield multiple eggplants at a time.  For now, 3 is the most I was able to pick at once, but my next harvest will surely be around 6.
Imagine me jumping up and down smiling clapping my hands with my braids flip flopping all over the place.
That is the image of how the idea of harvesting my own vegetables makes me feel.  Baby eggplants are so cute.  I read that if you harvest them too soon or let them grow too big, they will be bitter.  Since they start out purple, it's hard for me to know exactly what the right size should be since.. well, they are supposed to be baby eggplants.  So far, I think the right size is slightly smaller than my fist.  I have a small fist, though.  I guess the size of a roma tomato.  The skin should be glossy.  If it's not glossy, it may be too ripe.
Anyway, as I was harvesting, my lovely neighbor offered me some of her ripe and juicy beef heart tomatoes off her vine.  The stars were aligned in my favor that day.  What a happy couple tomatoes and eggplants make.
I think I'm in love with the night shades...
Serves 6-8 as an appetizer
Ingredients
2 big juicy beef heart tomatoes, sliced thickly
3 baby eggplants, halved (sub 1 small eggplant, cut into 1 inch cubes)
few pinches dried thyme
cracked black pepper
few pinches fleur de sel
drizzle olive oil
Batter:
2 large eggs
1 cup buttermilk (I put a plain yogurt in a measuring cup and topped off with milk)
2 Tbsp olive oil
1 Tbsp sugar
1 tsp freshly cracked black pepper
pinch fleur de sel
1/2 tsp dried thyme
1 1/2 cups cornmeal
1/2 tsp baking soda
2 tsp baking powder (sub 1 tsp baking soda if GF)
 Directions
1.  Prepare the topping.  Place the tomato slices and eggplant pieces on a baking sheet and sprinkle with thyme, black pepper, fleur de sel, and drizzle with olive oil.  Roast in the oven at 200°C 400°F for about 20 minutes.
2.  Prepare your baking dish.  Cut a circular piece of parchment paper to put at the bottom of your baking dish.  Place the roasted tomato slices and eggplant pieces onto the parchment paper.  This is going to be the top of your cake once it's flipped.
3.  Prepare the batter.  In a mixing bowl, beat the eggs with the buttermilk, olive oil, and sugar.  In a separate mixing bowl, put all the dry ingredients and mix with your hands to evenly distribute.
4.  Carefully pour the wet ingredients into the dry ingredients and mix until just combined.  Don't overdo it.
5.  Pour the batter (it should be somewhat thick) into your baking dish over the tomatoes and eggplants on the parchment paper.  Use a spoon to spread it evenly across the dish.
6.  Bake at 200°C 400°F for 20 minutes.  The top should start to look golden and the sides should be starting to pull away.
7.  Let cool 10 minutes, then run a sharp knife around the sides to loosen the cake from its mould.
8.  Flip onto a plate, and cover until ready to serve.
9.  When ready, remove the layer of parchment paper and slice.
Serve warm or cold.  I served mine with a salad and called it a meal.  The leftovers were partly eaten for breakfast and partly cut into little cubes and served at happy hour with a toothpick the next day.

This lovely cake is slightly sweet, due to the corn flour.  It is a surprising combination that works quite well and has an interesting presentation.  The batter is just a blank palette for any other combinations now.. zucchini slices.. added feta, caramelized onions, spinach, broccoli.. ooh I'm getting all kinds of ideas.  Oh dear.. jalapeño cake is going to happen... ooOoh!
So now you can have your cake... and eat it too!

Print Friendly and PDF

Friday, September 2, 2016

Black Bean & Beet Veggie Burgers

Shortly after purchasing a burger press, I figured anything could be shaped into a burger.  It didn't always have to be ground beef.  I could mix different meats, hide edible surprises inside patties, or even go all veg.  Why not give it a try?
Making an all veg burger is quite a challenge.. but only because I'm calling it a burger.  Calling it a burger means it should resemble meat.  In a meat burger, there is outer char, juicy inside, texture, and doesn't need much seasoning to be delicious. Trying to replicate all those aspects is a long process, but if you plan ahead and make enough to freeze individual patties, you are a total winner.
Just like me.
The reward for all your efforts is to have it on a bun with all your favorite fixings.  Nothing can beat that reward.  Plus, this one is made with beets.  So you can beet that... haha.
Recipe adapted from TheKitchn
Serves 8
Ingredients
2 Tbsp olive oil
1 onion, diced
4 cloves garlic, grated
2 Tbsp apple cider vinegar
3 red beets, roasted @ 200°C 400°F for 50 minutes, then peeled, grated, and squeezed
1/2 cup quinoa, rinsed, cooked, and cooled
1 1/2 cup dried black beans, cooked (or 2 cans, drained) and separated into 2 portions
1/4 cup dried figs (or pitted prunes)
3 tsp smoked paprika
2 tsp mustard
1 tsp ground cumin
1/2 tsp ground coriander
1/2 tsp dried thyme
salt/cracked black pepper
1 tsp Worcestershire sauce (sub balsamic vinegar if vegetarian)
1/4 cup oats, blended into flour
1 egg (optional)
Directions
1.  Heat the olive oil in a pan and add the onions.  When the onions are translucent, add the garlic.  Cook until the onions are brown.  Don't burn them.  Deglaze with the apple cider vinegar.  Remove from heat and set aside.
2.  Pulse one of the 2 portions of black beans with the dried figs.  You want them roughly chopped, not pureed.
3.  In a mixing bowl, add everything but the egg and ground oats.  Mix with your hands until the mixture is homogenous.
4.  If using, add the egg and mix well, then add the ground oats and combine well.
5.  Refrigerate this mix for at least 2 hours, at most 2 days.  It will be easier to form the patties when cold.
6.  Shape the burgers into patties.  I used my burger press with parchment paper (meatless burgers are sticky).  If you don't have a burger press, use about 1 cup of the mixture per burger.
7.  To cook, use a plancha, bbq, or griddle pan.  I used my cast iron griddle pan on high for 3 minutes on each side.  It should stay together if you don't poke it too much.  It won't stay together the way a beef patty would, though, so keep that in mind.  I was able to get some nice grill marks on mine.
Serve on a bun with your favorite fixings.
I like mine with lettuce, onion, tomato, a bit of cheese, some mustard and samurai sauce, a chipotle chile, sometimes avocado, and always an egg.

I have to admit to how proud I am of these burgers.  All I wanted was to get a bit of char on there, and feel like I'm biting into something.  Of course, the texture is not the same as a beef burger, but it's not too far off.. and it definitely deserves its place on the grill.
I'm almost out already, so I'm going to be making a bigger batch soon.

Print Friendly and PDF

Wednesday, August 31, 2016

Home-Fermented Ginger Ale

Good things come to those who wait...
Naturally occuring bubbles have always intrigued me, starting with Perrier.  I just can't get my brain around the fact that water flows from the ground already bubbly.  That is just insane!  To be fair, Perrier does reinforce the natural carbonation before bottling.. but if you did go to the source, it would be eyelashflutteringly bubbly.
Then there are the fermented drinks.  Then there are drinks like beer and champagne that start out flat and become bubbly.  That is equally insane, because in all my past experiences, I have only observed the reverse process.  The drink starts out bubbly and ends up flat.
Then one day, many many years ago in a far away family vacation home on the Normandy coast, my aunt opened a bottle of homemade "Limonade" she had stashed there from the previous year.  It was not too sweet, nice and lemony, and most importantly, BUBBLY!  She explained that she made it herself and the carbonation just naturally happened (but she was giving it to us kids, so it couldn't be like beer or champagne).
I was humored and a bit skeptical about the process, but was too young to actually pursue the curiosity.
Then, some 15 years later, I was gifted a bottle of olive oil with a flip cap.  That bottle made me flashback to that summer in Cabourg.  I decided I would try to make something that naturally carbonates.
As I looked through the different processes, it turns out that consuming fermented foods and beverages brings gifts to your body.  The probiotics in cultured food are a major cruise line all you can eat buffet for your flora.  Come to mama Lactobacillus!
Awesome.
I still would have done it even if there were no bonus points.  I wanted to do it because it's my little experiment at the moment.
For my very first try, I wanted to make ginger ale.  Because ginger is delicious.
You can't say the word "rhizome" in front of me without me yelling out GINGER!
Yes, it has accidentally happened before.
In order to make home-fermented soda, you need a culture.
Ok, everyone belongs to one culture or another, but I mean a pet living thing that you need to feed.  There are different types, but I feel the easiest to make (for me at least) is the Ginger bug.
The Ginger Bug is a mixture of grated ginger, sugar, and water left out at very warm room temperature until it ferments, then can be used as a base for a number of home-made sodas.
Mine spontaneously fermented in 48 hours.  So cool!
Follow Ginger Bug instructions from WellnessMama.
I'm also working a different type of ferment with "Limonade" which calls for rice, sugar, lemon juice, and water, but I'll get to that in a different post.  It's not quite ready yet.
I've made the ginger ale a coupe of times using the same ginger bug I've been keeping alive since the first bottle, so I'm confident in this recipe that has tested out quite well.
Yield 1 L or quart of Ginger Ale
Ingredients
1 inch piece ginger, grated
1/4 cup rapadura or cane sugar
1/4 cup lime juice
1/4 tsp sea salt
1/4 cup Ginger Bug
3-4 cups non chlorinated water (not direct tap water)
Directions
1.  Place 1 1/2 cups water with the rapadura, salt, and grated ginger to heat on the stove.  Simmer for 5 minutes until the sugar dissolves.  Let cool!  You don't want to kill your magnificent ginger bug now do you?
2.  Using a funnel, pour the ginger bug, lime juice, and stovetop mixture into your flip top glass bottle.  Top off with the non chlorinated water.  Make sure you don't fill it too high.  Do not close the flip top right away.  Cover with a cheesecloth or coffee filter along with a rubber band.
3.  Leave out at room temperature for 2 days before closing the flip top.  Then leave out for 3 days maximum after bottling.  During this time, it will naturally carbonate.  Check it everyday to see any bubbles.  Once you start seeing them, you can refrigerate, which stops the carbonation process.  If you leave it out too long, you will have a geyser when you open it.
4.  Serve chilled.

The taste is incredible.  It's not sweet at all although there seems to be a lot of sugar going in, very gingery, almost spicy, ultra bubbly, and a bit yeasty.  Everything I love and more...
My experimentation is going to branch out into a few different directions.. I'm so excited!

Note:
If this is the first time you are making a home-fermented soda, make sure you open it very carefully over the sink or even outdoors.  The first time, 3/4 of the bottle did an Old Faithful on me all over my kitchen.  I was left with only 1 little glass to taste and the rest to lick off the floor.  I had left it out 5 days instead of 3.. during a "heat wave".
The 2nd time I left it out only 3 days, but filled it just a bit too high.  I opened it outside and held the flip cap down to let some of the air out before totally opening it.  This time, it geysered out but I was able to catch some of it with my glass, and I was left with over half of the bottle + 1 glassful.  Not bad.
The 3rd time, I left it out only 3 days and didn't fill it too high.  The carbonation was strong, but I didn't make a mess.
Different room temperatures may yield different waiting times.

Be Patient...

Print Friendly and PDF