Search this blog

Translate

Wednesday, July 31, 2013

Jalapeño Coconut Cookies

I wasn't planning on posting these cookies since they're a slight variation from my other jalapeño cookies, but they got such great reviews at work from people who claim not to eat much spicy food, that I had to give the exact recipe.  Mostly so I will remember for next time.
Yield approx 25-28 cookies
Ingredients:
1 1/3 cup flour (140g)
1/2 tsp baking soda
1/2 tsp salt
1 tsp cayenne pepper
1/4 tsp cumin
1/4 lb (100g) softened butter
1/2 cup (100g) brown sugar or cassonade
1 egg
1 tsp coconut oil
1 large jalapeño or Morrocan chili, minced (approx 1/4 cup)
1 tsp maple syrup
1/2 ts lime extract or mango powder
90g dried coconut
Directions:
1. Sift together the flour, bakong soda, salt, cayenne, and cumin.  Set aside.
2.  In a separate mixing bowl, fluff the butter and sugar together.
3.  Add the egg and beat well.  Add the coconut oil, maple syrup, and lime extract and mix until smooth.
4.  Add the minced jalapeño and coconut and mix well.
5.  Swap your whisk for a wooden spoon and incorporate the dry ingredients into the wet ones.  If it's hot in your house, the mixture may seem too gooey to manipulate.  Refridgerate for 10 minutes to make it easier.
6.  Preheat oven to 350°F or 175°C.
7.  On a baking sheet, place tablespoon sized balls of dough, lightly flattened and sprinkled with extra coconut (or cayenne if you are feeling naughty).
8.  Bake for 12-14 minutes then quickly transfer to a wire cooling rack.

Nicely offer a cookie to a friend or coworker and stand back for the confused but delighted reaction.  I found it best not to reveal the ingredients and let the taster discover the sensations as they come.  I really didn't think so many French people would appreciate this..but I'm happy they did!
They were more popular than my Cinnamon Rolls..what is with the French and their aversion to cinnamon?

Print Friendly and PDF

Tuesday, July 30, 2013

Prasopita Kozanis (Leek Pie)

I was recently flipping through the book I usually use as a weight while making paneer and found a bunch of Turkish and Greek recipes I had never paid attention to before.  It's strange how I can flip through a cookbook a million times but at different times of day or year and I will always discover something as if it was the first time.
Hmm interesting.  I've heard that before in a slightly different context..
It's a miracle its still in good shape after this afternoon's baking shenannigans of flour and sugar all over myself and the floor while listening to A Day at the Races.  I have cinnamon and coconut stuck between my toes!
Again, I digress.  This Prasopita was perfect for my "enterrement de vie de jeune fille."
Goodbye adventurous 20's and welcome glorious 30's!
I've seen many Prasopita recipes using phyllo pastry, but this one uses semolina instead.  I like it better this way.  I would never have thought to use semolina this way before.
Serves 6 as an appetizer
Ingredients:
3 leeks, sliced into rounds and thoroughly washed
3 Tbsp EVOO
1 bunch dill (I used tarragon)
2 bay leaves
1/2 cup coarse semolina (50g)
3 eggs, beaten
1cup (100g) grated Gruyere/Swiss or Kasseri cheese
3 Tbsp breadcrumbs
7 oz (200g) cubed feta
Salt/pepper
Directions:
1.  In a wok, heat the oil and fry the leeks for approximately 5 minutes.
2.  Add the dill and bay leaves.  Stir and cook for another 10 minutes or until almost tender.
3.  Remove the bay leaves, add the semolina and incorporate.  Add some salt and fresh pepper.
4.  Lower heat and stir in the beaten eggs and grated cheese.
5.  Preheat oven to 425°F-220°C.  Sprinkle the breadcrumbs into a baking dish and transfer the leek mixture into the dish.
6.  Arrange the feta cubes over the surface of the dish.  Cook for 30 minutes.
haha they look like paneer!

Serve hot or warm.
I'm really appreciating the warm these days... For certain things only.
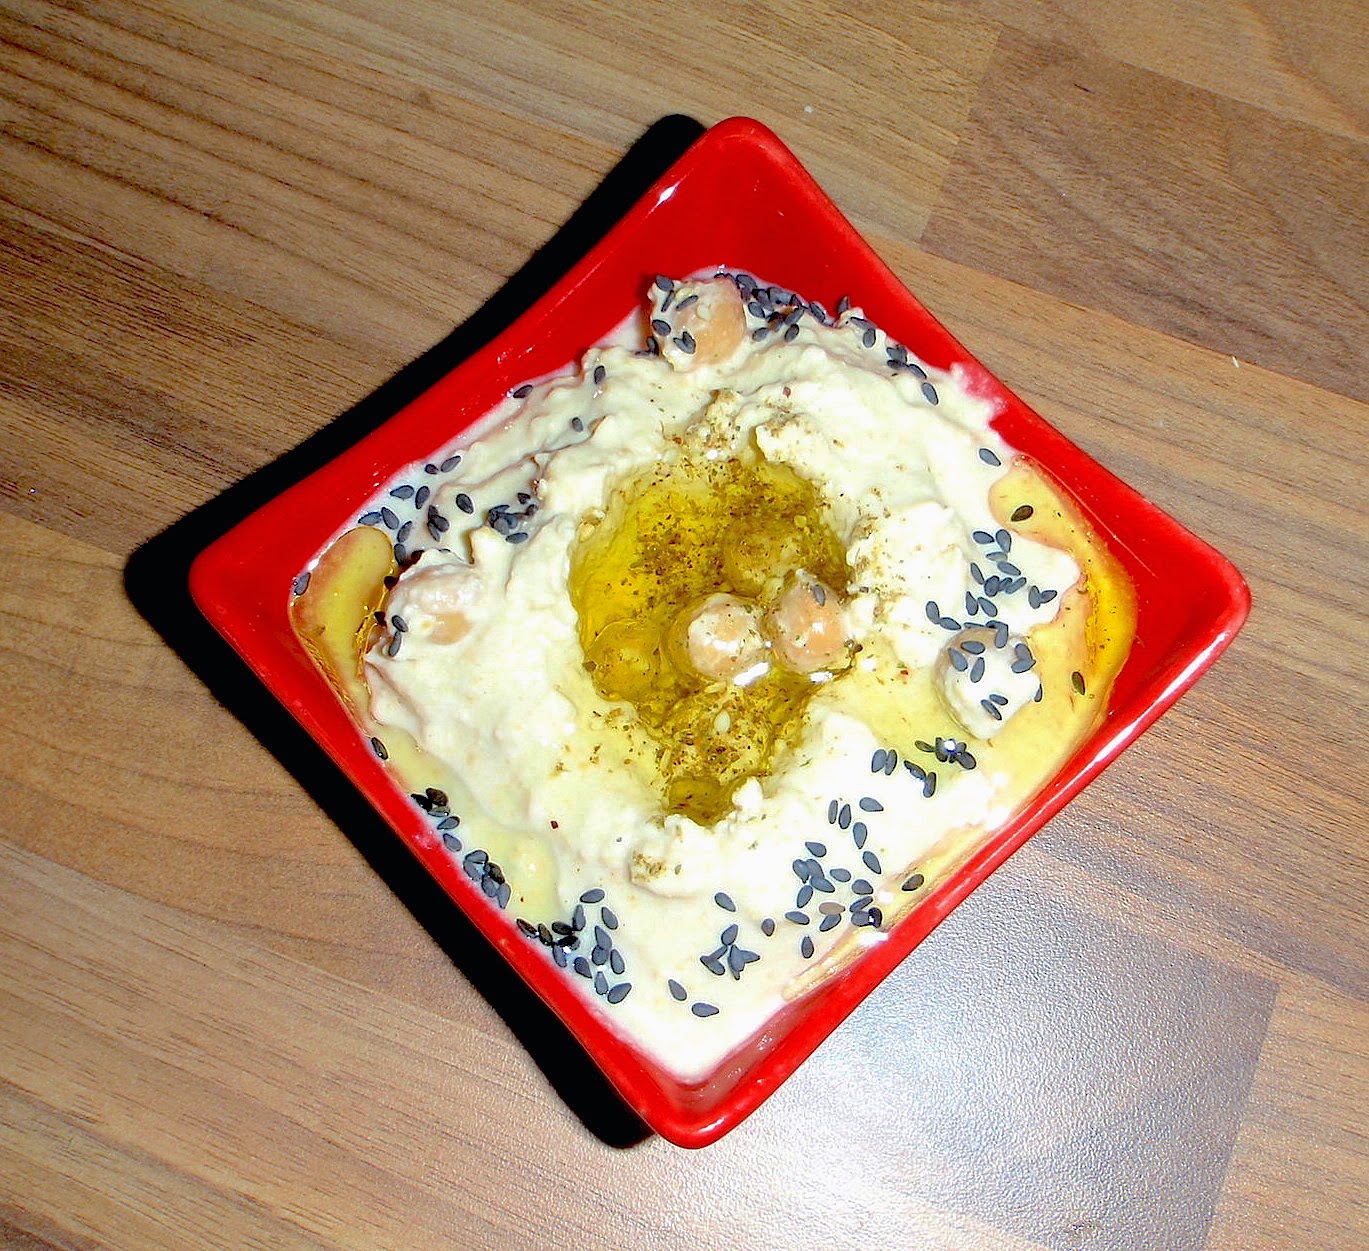
That hummus is the best I've made so far.

Print Friendly and PDF

Sunday, July 28, 2013

Cajun Chicken Pasta

 I may have multiple nationality disorder...which means I'll never get security clearance at Northrop, but I'll always be varying up the flavors in my kitchen.
Last week, I couldn't have a real meal without ginger, garlic, and fish sauce.  The week before I felt incomplete without garam masala.  Today I'm craving something all American.  Ok maybe not ALL American, more like southern gulf coast American with old territorial issues with France.
Actually, Louisiana was a territory as big as 1/3 of the actual US before being reduced to the Louisiana Purchase, and the further reduced to the state of Louisiana.
Actually, who cares. (no offense, but this is a food blog, not a historical geography blog)
Why do I always go off on tangents?
So, one of the well known flavors from this area of the globe is Cajun Spice.  It's like the garam masala of the bayou.  They use it on meat, fish, grilled veggies, probably fries and they should, because it's tasty and has a nice kick of spice.  It's a mix of paprika, cayenne, garlic powder, onion powder, black pepper, thyme, oregano, and salt...and I'm using it to jerk up my pasta!
Serves 6
Ingredients:
3 chicken or turkey breasts, cubed
 2 tsp Cajun spice
1 Tbsp EVOO
1/2 red onion, sliced
2 bell peppers (mix different colors) roughly chopped
3 cloves garlic, chopped
2 cups chicken broth (or 2 cups whey + 1 bouillon cube)
1/2 cup heavy cream
1 lb (500g) linguine, cooked al dente
some fresh black pepper
some chopped parsley
some chopped goat cheese
Cajun Spice:
 4 tsp paprika
1 tsp salt
1/2 tsp cayenne
1/2 tsp black pepper
1/2 tsp garlic powder
1/2 tsp onion powder
1/2 tsp thyme
1/2 tsp oregano
Directions:
1.  In a mixing bowl, pour the EVOO and Cajun spice on the meat and mix well with your hands so all the pieces get some of that flavor.  Refridgerate while you chop the veggies.
2.  In a very hot heavy based pan or plancha or iron skillet, grill the chicken so it gets colored on all sides.  I did it in batches so the pan did not get overcrowded.  My pan is stone coated non stick.  If using a skillet, you may need more EVOO+butter.  Remove the meat and set aside.
3.  In the same skillet, add the onions and bells.  Toss around for 5 minutes, then set aside.
4.  In the same skillet, add the tomatoes and garlic.  Cook until tomatoes break down.
5.  Add the broth.  Bring to a boil and let simmer until reduced.. maybe 15 minutes or so.
6.  Add the cream, stir until evenly incorporated, then add the meat-veg mixture and bring to a bubble.
7.  Toss with al dente linguine.  If you like your pasta a bit softer, keep on low for a few minutes.  The flavor will infuse into the noodles for ultimate satisfaction (one thing at a time, please!)

Serve garnished with chopped parsley, pepper, and goat cheese.
And eat while listening to L.A. woman.
If you do this, and close your eyes, you will be transported into my dimension.
Warning, you may never find your way out...

The best way to describe this is peppery hot.  It's spicy, but with some nicely smoked background homey flavor.  Maybe there is no best way to describe this.  Just do it.

Print Friendly and PDF

Saturday, July 27, 2013

Marinade for Cuttlefish à la Plancha

Last time I grilled squid/baby cuttlefish on the plancha, I went for a more mediterranean marinade.
This time, I'm going ginger style.
For 500g baby cuttlefish
Juice from 1/2 lime (mine was very juicy)
1 Tbsp grated ginger
1 Tbsp grated garlic
1 tsp soy sauce (or GF alternative)
1 tsp sesame oil
1/4 tsp chili powder (I'm having non spicy guests over)
A few shakes white pepper
1 chopped scallion
1 Tbsp chopped celery leaves

I'm also doing gambas, but with the Med style..to mix and match flavors.

I'm going to add a few drops of chili oil onto my own plate and serve with Shallot Cabbage refresher and some grilled bells.

Oooh nice!
The after dark idea was probably the best idea in the world... except that I don't have an outdoor light and couldn't see what I was doing on the plancha.. but hey, ray charles played the piano!

Print Friendly and PDF

Chile Oil

As I psychologically prepare for after dark plancha time invlolving my dear friends the Gambas and the Sepias, I macerate chilis in oil.
It is my all time favorite pizza topping.. Probably more than parmesan, and I can easily imagine myself using it as part of a marinade or even as a condiment on...anything in the world.  The ones you buy can be expensive and sometimes the ingredients listed are some unknown vegetable oil.
There are only 2 oils with which chili oil is acceptable:
EVOO
Grapeseed oil
Don't go putting anything else in there unless you would dip you finger into it and happily lick it clean and repeat!
So this is more of an experiment because I mixed in fresh and dried ingredients, hoping for the best, and sadly realizing I should have done this last week if I wanted to use it today.  Once I have it readily available, I may find myself making it once a week with my other batch duties such as paneer, cookies, and the less glorious...laundry.
By the way, I read that people that eat cayenne pepper are less likely to be depressive.  I'm assuming the study refers to the endorphins released by raw heat, and I'm going to make a quick assumption that I my have found one of the contributors to my wild any-time-of-the-day mood.
Which is why I absolutely need to have homemade chili oil on hand at all times.
When I lived in the north, I would bring crushed red peppers to work to put in my chemical tomato soup while my coworkers drank their morning coffee.  At first they thought I was a strange specimen, but I did get a few of them to join me.  Who wouldn't agree with choosing spice over caffeine in the morning?
I digress...
Ingredients:
250mL EVOO
5-6 dried oiseau chilis (tiny hot ones)
5-6 fresh cayenne peppers, slit, but not halved
1 tsp szechuan pepper
1 garlic clove, peeled and lightly crushed
1 sprig fresh rosemary
1 bay leaf
Directions:
Place everything into a bottle and let macerate for a week (or a few hours in my case).

I say macerate and not marinate because I'm not planning on removing the ingredients to use later.  It's actually the reverse process I'm interested ing... The flavors all the ingredients will release into the oil.

Print Friendly and PDF

Thursday, July 25, 2013

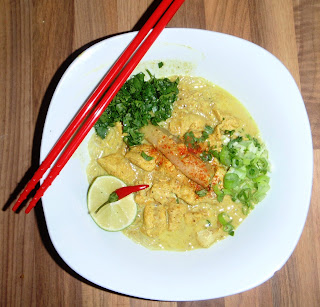
Coconut Noodles

Oooh I'm really getting the hang of Burmese cooking.  There are 2 rules I've noticed.
Use shallots
Use toppings
There's more to it than that, but if you have neither, then move on to your plan B.  I ran out of eggs, but some hardboiled eggs would have been perfect as a topping for this lovely creamy almost guiltless dish.  Naomi Duguid adds salt, but I feel it is salty enough without it.
Adapted from Burma: Rivers of Flavor p 251
Serves 4
Ingredients:
1 lb (500g) chicken breast, cubed (I used turkey)
1 tsp fish sauce (I used oyster)
1 cup water+ 1 bouillon cube
1 Tbsp grated ginger
1/4 cup toasted chickpea flour mixed in 3/4 cup water
2 Tbsp peanut oil (I used sesame)
1/4 tsp turmeric
1 1/2 cup minced shallots (about 2 large)
1 Tbsp garlic
3 small whole peeled shallots
1 can coconut milk
cooked egg noodles (I used cellophane)
Garnish:
lime wedges
chili powder
cilantro
scallions
thai chili
crushed peanuts
fish balls (I used cooked cubed cod)
egg (I wish I had some)
fried noodles (didn't have any)
Directions:
 1.  Mix the fish sauce with the meat and refridgerate while you chop everything.
2.  Heat the oil in a wok and fizz the turmeric.
3.  Add the minced shallots and cook until translucent, then add garlic and cook approx 30s.
4.  Add the meat and stir fry until all sides are colored.
5.  Add the chickpea mix, water, and bouillon cube.  Stir to incorporate.
6.  Add the whole shallots and coconut milk.  Bring to a boil, then simmer at least 10 minutes, stirring from time to time.

Serve over some excellent cellophane noodles (or egg noodles) with lots of sauce and as many toppings as your heart desires.

This was lovely over the bean thread noodles, but I think it would be even better over rice.  Tomorrow's continuation of this dish will be with rice.
It's always a good time @ my table.. always my pleasure...

*It's even better with rice.  Forget the noodles!
**do not use egg noodles if GF

Print Friendly and PDF

Wednesday, July 24, 2013

Lemongrass Ginger Meatballs

My handy Burma book has inspired me again!  My plan tonight was melon.  Whatever happens, there will be melon involved.  I also had ground beef I needed to either use or freeze.  Since Lahmacuns have been lingering, I seriously was orienting my cooking vibes toward that during the day.. only to rediscover upon my home arrival that I needed yeast for the dough.. and my yeast is not fast acting, so the event would take 4-5 hours...too long for a weeknight.  I will have to do that on the weekend or do a prep the night before.  My post 30 cooking will be involving a pizza stone, so maybe I'll wait until then.
Back to my balls..
Ha!
Determined to use some ground beef after a week of pescatarianism, I finally looked at the beef&pork part of the book and happily stumbled upon page 192: Lemongrass ginger sliders.
I had to look twice because I always thought sliders were served on potato skins, but that might be a misinterpretation of a long lost american in her new yet acceptably homey expatted country.
I'm keeping them as good ol round meatballs.  Less like burgers, more like balls.  I like shaping things into balls with my little hands... falafel, manchurian, methi gatte, bagel bombs...hmm interesting.
Makes 17-19 balls (depending on the size of your hands)
Ingredients:
1 lb (500g) ground beef
1/4 tsp turmeric
2 Tbsp minced lemongrass (I used dried)
2 Tbsp minced garlic
2 Tbsp minced ginger
1/2 cup minced shallots (about 1 large)
1/2 tsp salt (or to taste)
1/4 cup cooked rice (I used quinoa)
1/4 tsp strong chili powder (mine is strong, adjust accordingly)
1 large tomato, minced
1/4 cup peanut oil (I used 2 Tbsp sesame)
Directions:
1.  Take off your rings and thoroughly wash your hands.  Mix the meat and turmeric, then refridgerate while you do the rest.
2.  In a mortar, smash the lemongrass, garlic, ginger, and shallots together until they make a paste.
3.  Keep mashing in your mortar (ok ok food processor if you are not gangsta enough to own or want to use a mortar) and add the salt, chili powder, and tomato.
4.  In a mixing bowl, add the goodness from the mortar to the meat and incorporate well, using your hands.  We have been blessed with 5 digit tools on each side of our bodies, why wouldn't we use them?
5.  Once everything is evenly incorporated, add the rice (or quinoa) and do the same.  Then form meatballs approx 1 1/2inches in diameter or however you are comfortable forming meatballs using the palm of you hand.
6.  In a heavy based pan, heat the oil.  Arrange the meatballs so they are not over crowded in the pan.  Cook on high 3 minutes so they color, then turn.  The idea is that they get a bit golden.  This can be a quick process.  What I did was color them, then transfer them to a 120°C oven while I set the table and cut my melon.

Serve with a side or alone with some dipping sauces.
I served with some salad, sriracha, and melon.  Tomorrow for lunch, this will be happening with some Cabbage Shallot Refresher... and another fruit.

This was a keeper.  This is the first time I make meatballs using beef and I have to admit the flavor is rather explosive.. in a good way.  In a very very good way!  I can imagine these on a skewer or in a sandwich or just by hand any time of day.  They don't even need to be hot.. just room temperature is lovely and I feel the flavor entirely released as the sum of the parts become a whole.

Print Friendly and PDF

Monday, July 22, 2013

Tahini

I always wondered how they got that tahini into a lushious white sauce.. I always thought they added yogurt

It's just tahini stirred with water and a squeeze of lime juice.

Who knew it would turn white?

I recently learned that I detain the 2 best tahini brands you can get outside of Israel/Palestine.

Achva from Israel
Al Wadi from Lebanon

Lucky me!
And the winner is..... Al Wadi by far!! I just did a raw tablespoonful taste test and Al Wadi is like nectar.  Achva is good too, but really not the same.
This is going to make life so much sexier!
Here is the "Real" hummus ingredients according to the Hummus Blog:
1 cup dried chickpeas, soaked long long time, then cooked and peeled
1/2 cup (130g) excellent tahini
Juice from 1 lemon
1/2 tsp cumin
1/4 tsp salt (or more)
2 garlic cloves
Enough cooking water for the hummus to be of desired consistency

Oh and if I had an ice cream maker I would totally make Tahini ice cream!  I just tasted some and it is seriously out of this world!!!!

Print Friendly and PDF

Sunday, July 21, 2013

West Coast Mohinga

I think this is my most successful Burmese dish.  I feel more connected to the tradition and concept of Burmese cuisine after making my first mohinga.  Mohinga is the claimed national dish in Myanmar.  It is usually eaten for breakfast, but can be found in tea shops at all times of the day.  Every region makes their mohinga differently, and I'm pretty sure even if I make it again it will not be the same because of all the customizing and toppings you can add and swap.  It's like a topping party!
This is another one from Burma: Rivers of Flavor p 256.
Serves 4
Ingredients
1.5 - 2lb (approx 1kg) whole fish, cleaned and scaled (I used mackerel, cod, and sardine)
2 Tbsp peanut oil (I used sesame)
1/4 tsp turmeric
cooked rice noodles (I used the flat ones)
broth:
5 cups water
1 tsp shrimp paste
2 Tbsp chopped galangal (I used 4 slices dried)
2 Tbsp chopped garlic
2 tsp fish sauce
piece of banana stem (I didn't have any)
garnish:
toasted chickpea flour
chopped cilantro
fish sauce
shallot or garlic oil (sesame oil)
crushed peanuts
hardboiled egg
black pepper
tamarind water (1 Tbsp concentrate diluted in 1/2 cup water)
red chili paste
fried shallots
thai chili
grilled sardines (not in the book)
Directions
1.  Make the broth by bringing to a boil the water, shrimp paste (don't smell it!!!), galangal, and garlic.  Add the whole fish and poach for about 4 minutes.
2.  Take off heat and remove the fish from the pot.  Let cool, then use your hands to separate the flesh from the head and bones.  Squeeze all the water out of the flesh and set aside.  Add the skin, heads, and bones back into the pot and simmer for at least 10 minutes.
3.  While that's happening, heat the oil in a wok, then add the turmeric and let it fizz.  Add the fish flesh and stir so it all gets a nice yellow coat.  Cook until flaky and dry, then set aside.
4.  Back to the broth.  Strain it of all its solids, then add 2 tsp fish sauce and the banana stem, if you were lucky enough to find one.  I forgot to look for it during my spice hunt.  I have no idea what it is supposed to taste like.  Oh well.  Keep simmering for a while, while you get the toppings and noodles ready, for instance.
5.  Serve.  Place some rice noodles in a bowl.  Add 1 tsp chickpea flour, 1 Tbsp tamarind water, a few drops sesame oil or shallot oil, some chopped cilantro, black pepper, peanuts, fried shallots, flaked fish, egg, chili, and chili paste.  Ladle the broth over the noodles and toppings.

When you taste, a warmth will hit you.  You will be surprised at the comfort you feel as you slurp the noodles, adjusting the toppings to suit your desires.
I got an extremely positive reaction:  "Wow this tastes wonderful" which is a rare to hear.  Not that I don't usually cook well, but I rarely get compliments without asking.  Today I got a spontaneous compliment.. on a fish meal... which is even more rare.

Print Friendly and PDF

When eggs are the main event

  
Sunday morning kind of eggs:
Perfectly over easy with goat cheese, green chutney, sliced chicken, and caramelized red onions

In my house, we have eggs for breakfast on the weekends.  When I say eggs, I mean perfectly over easy eggs.  When eggs are the main event, over easy is my absolute favorite way to eat them.  Scrambled eggs are only acceptable in a breakfast burrito or in fried rice.
What I love about over easy is that it feels like a gift.  I like to eat around the yolk to build up the excitement, and when I can't handle it anymore, I polk the middle and watch the warm dark yellow/orange gooey yolk ooze out.  I can then use the other spectators on the plate to sauce up the gift that is pouring its heart out.  Sometimes some of the yolk wants a panoramic view and stays put on my lips for the grand finale... the lip licking.
I can go on and on about this.  To make a perfect over easy egg takes skill.  Nothing upsets me more than when one of my yolks breaks in the pan before arriving as a wrapped package on my plate.
I've noticed a few things that never fail me during my Sunday morning ritual.
1.  Eggs need to be fresh, free range and organic if possible.  They shouldn't accidentally break in your hands (unless you're a crazy brute).  Then should not float if you put them in water.  Don't use old eggs if you're planning on a liquid yolk.
2.  Eggs need to be room temperature before cooking.  The yolk will less likely give in if it has been out of the fridge for 10 minutes before hitting the pan.
3.  Pan needs to be very hot.  Don't crack your eggs into a cold pan.  Who does that?
4.  Garnish only after the flip.  It avoids things like cheese sticking to the pan and breaking your masterpiece.
 I didn't think it could be so passionate, but I get as much enjoyment out of preparing as I do out of eating.

Sunny side up eggs pretty much follow the same rules as 1-2-3, except I like to turn the heat down after about 1 minute, then garnish with some nice casera or arriera salsa and cilantro.  In the photo I had added some cheese from Auvergne that melted nicely into the whites.

Wednesday evening kind of eggs:
Almost hard boiled with yolks still creamy and a bit of Szechuan pepper together with raw beets, green chili, and rice, wrapped in romaine leaves to avoid utensils.

Eggs in a salad or for dinner in my house almost always have this form.  I usually eat them cold or at room temperature, and I like to keep them intact.. not chopped up and unrecognizeable.
To make an almost hard boiled egg, I gently place them in a pot and fill it until covered + 2 to 3cm with water.  Then I turn the heat on high and wait 12-15 minutes.  12 is when I want them less cooked than pictured.. a little oozy.  15 is when I want them congealed.  After cooking, I run cold water on them and let them chill until ready to eat.
Peel under cold water.. the water (if you're lucky) finds its way under that thin membrane around the egg where the shell will almost naturally come off.  I only just recently learned that and it is a radically efficient method.
This gives you a delicate white and a melt in your mouth yolk.

Treat your eggs with respect.

Print Friendly and PDF

Saturday, July 20, 2013

Sardines à la Plancha

Some marinated in magic green chutney, some naked
I don't think I've ever enjoyed sardines as much as I did today.. and this was just the appetizer!
Fresh whole Mediterranean sardines may be the best I have available.  I avoided the big ones, since I didn't gut them.  I think the Med ones are better than atlantic because the Med is a lot saltier, so the fish ends up tastier.
I wanted to do a marinade, but again, since the fish is whole, it doesn't make much difference.  The green chutney works well as...well, a chutney while you eat.  I turned up my plancha to 300°C sprayed a bit of EVOO, layed these babies on their right side for about 1 min 30 sec, then I flipped them to their left side and did the same while squeezing some lime during the cooking.  Before removing them, I lightly sprinkled with salt and served just like that, on a communal plate and ordered my very French guests to eat with their hands, and eat the entire sardine...head to tail, just like I did.

OoooOooh!

It's a psychological thing, I suppose.  They insisted on using utensils and removing the bones and didn't even taste my chutney.  Ah le french!
The head gives nice extra crunch to the sardines.  It really isn't necessary to start picking the meat off the bones

Print Friendly and PDF

Peanut Butter Banana Oatmeal Cookies

Quick scan of the kitchen....beep radar detects something transformable.
Mushy bananas! Yes, something I can integrate easily into this week's round of cookies.  I don't know of many fruits that go better with PB than bananas.  Ok, apple and celery are high on the list (since when is celery a fruit?) but banana is PB's first lady.  Don't tell PB that his first lady regularly hooks up with different forms of chocolate shh!
I'm digressing.
This recipe is a tweeked version of the other PB cookie where I'm basically subbing banana and oats for ground almonds.  My goal is to keep it crunchy like a "sablée" because that seems to be the texture my entourage prefers.
Makes 46 tbsp sized cookies
Ingredients:
240g whole wheat flour
130g mashed banana (about 2 small)
100g butter
150g cane sugar (3/4 cup)
1 tbsp maple syrup
Pinch of salt
1cup oats
200g pure peanut butter.. Smooth or chunky
1 tsp cinnamon
Some crushed peanuts for decorating
Directions:
1.  Sift the flour, salt, and cinnamon together.
2. In a separate mixing bowl, cream the butter and sugar until fluffy, then add the maple syrup, peanut butter, and banana.  Mix until smooth.  Make sure you use quality peanut butter (100% peanuts) and avoid PB with extra unidentified oil.  I used to swear by Skippy, but when I realized how much palm oil and sugar it has, I switched to Dakatine.
3.  Add the dry ingredients into the wet ingredients and mix until you have a big ball of dough.  You will need to set down the utensils and use your hands to make this come together.  Add the oats and knead until fully incorporated.
4.  Heat the oven to 175°C (350°F).
5.  Make tablespoon sized balls out of the dough, dip the top into some crushed peanuts, and press them into shape onto a cookie sheet for baking.  These do not have eggs so the shape you leave them in is the shape they will be when cooked.
Bake for 13-15 minutes, then transfer to a wire rack and let cool.

Store at room temperature in an airtight container.

Print Friendly and PDF

Wednesday, July 17, 2013

Zucchini and Sundried Tomato Cavatappi with Grilled Turkey

I was (politely) asked to take a break from the Asian subcontinent and make something more European.
I wouldn't go as far to say "your wish is my commande" but I do enjoy a good pasta dish, especially when there's texture involved.  And what's more "European" than piment d'Espelette? ha!
There is nothing complicated here, just seasoned grilled white meat over some extra sexy sauce.
aah you came for the sauce, right?  Because seriously, who cares what type of meat and what shape of pasta you use?  The secret is in the sauce.  You want to make it not too heavy, just perfectly balanced with acidity, creaminess, aldente-ness.
Serves 4
Ingredients:
 4 turkey (or chicken) cutlets
300 g cavatappi (or other) pasta, cooked al dente
1 large zucchini, sliced
large handful (I have small hands) sliced sundried tomatoes
1 Tbsp tomato paste
1 Tbsp dried piment d'espelette (or paprika if you're afraid)
juice from 1/2 lemon
4 cloves garlic, grated
a few sprigs fresh rosemary
1/2 chicken bouillon cube, crushed
1/2 cup whey or reserved pasta water
1/4 cup heavy cream
some EVOO
some fresh black pepper
large handful (again, small hands I have) parmesan
Directions:
1.  Brush some EVOO, piment d'espelette, a bit of the garlic, and some pepper on the cutlets.  Grill or pan fry with a bit of fresh rosemary and some lemon juice, then set aside.
2.  In a wok, heat some EVOO and add the zucchini, some sprigs fresh rosemary, and most of the piment d'espelette.  Stir, cooking, and add the garlic, pepper, and the rest of the lemon juice until bite tender.
3.  Sprinkle the crushed bouillon cube over the zucchini and add some whey.
4.  When heated through, add the tomato paste and incorporate.
5.  When the pasta is al dente, drain and toss with the sauce, the sundried tomatoes, the parmesan, and some heavy cream (depending on the creaminess factor you wish to achieve).

Serve with some extra black pepper and extra parmesan or swiss for a creamy yet perfectly balanced delightful "mise en bouche"
oooh!

Print Friendly and PDF

Tuesday, July 16, 2013

Gatte ki Subzi

I had to repurpose my fenugreek fritters that turned out more like dry dumplings...and then I thought, hmmm, dumplings, I could work with that!  I remember eating this a few times in Rajastan, and I found it to be full of texture and flavor, and makes you forget it's completely vegetarian.  I'm really not doing this veg thing on purpose, but I feel like I'm discovering a whole new world.
I adapted a recipe I found on ShowMetheCurry and subbed my failed methi fritters (which were basically made of chickpea flour, water, and dried fenugreek) for the dumplings.  Since I had to hide them in this curry, I will not give the recipe, but show how to do it the OG way.
Serves 4 as a meal, 6 as a side.
Ingredients
for gatte (dumplings):
1 cup chickpea flour (besan)
1/4 tsp chili powder
1/4 tsp garam masala
Turmeric Powder – 1/4 tsp
1 Tbsp ghee or oil
1/4 tsp minced ginger
1/4 tsp minced garlic
1/4 tsp or more minced green chilis
1/4 cup yogurt
4 cups water
for the curry:
2 Tbsp oil
1 chopped tomato
1 cup yogurt
1/4 tsp chili powder
1/4 tsp turmeric
1 1/2 Tbsp ground coriander
1 or more chopped green chilis
1 tsp grated garlic
1 tsp grated ginger
chopped cilantro to garnish
Directions
1.  Make the gatte (dumplings).  In a mixing bowl, add chickpea flour, chili powder, garam masala, and turmeric. Mix well, then add ghee or oil.
2. Add ginger, garlic, green chilies and yogurt. Knead to form a stiff dough (dough will be sticky).
3. In a deep pot, bring 4 cups of water to a boil.
5. Lightly coat fingertips and hands with oil. Divide dough into approx 4 portions and roll each portion between hands to form a thin log shape.
6. Drop the cylinders into the boiling water and boil for approx 5 minutes. Be sure to gently stir after the first minute. Logs will float up when they are cooked – continue boiling for 1 minute more.
7. Remove from water and allow logs to cool before cutting them into 1/2 inch pieces (gatte). Keep the water for later.
8.  Make the curry.   In a mixing bowl, add yogurt, chili powder, tuermeric, ground coriander, green chilies, garlic, and ginger.  Incorporate all the ingredients and set aside.
9.  In a wok, heat the oil.  Add the cumin seeds until they sizzle, then add the tomatoes and cook until they mush together.
10.  Add the gatte (dumplings) and cook for 2 minutes.
11.  Take off heat and stir in the yogurt mixture.
12.  Put back on heat and add in 2 cups of the reserved water from step 7.  I used whey for this.  Cover and cook for 10 minutes.

Serve garnished with cilantro (not pictured) with rice or roti.
Needless to say, I saved the day with this!
Middle: Gatte ki Subzi

Print Friendly and PDF

Monday, July 15, 2013

Muttar Paneer Curry

Here is another pea curry I find especially pleasant with the addition of paneer and mint.  Oooh!
I can't take credit for this, of course, but ShowMetheCurry is the best website for learning authentic Indian methods.  Great for beginning Indian cooks, but also for more complicated dishes that require technique.  I've never had a flop while following their directions.
I was afraid the mint would take over the dish, but here it really acts as a compliment to the other flavors.  It is a bit surprising "en bouche" but very pleasant with the additional texture of the paneer and the bite of the peas.
Serves 4 as a meal, 6 as a side
Ingredients:
2 Tbsp Oil
1 bay leaf
1 inch piece cinnamon stick
2 cloves
2 cardamom pods
1 large onion, chopped
2 large garlic cloves, minced
1 inch piece ginger, minced
1 chopped green chili
handful mint
1/2 cup packed cilantro
1/2 lb (250g) Paneer, cubed and pan fried until golden, and soaked
Salt – to taste
1/4 tsp black cumin (nigella)
1/4 tsp turmeric
chili powder to taste
1 tsp garam masala
1 lb (500g) frozen green peas
1/2 cup plain yogurt
3 Tbsp heavy cream
Water or whey as needed
Directions:
1.  Heat 1 Tbsp oil in a wok and add in the onions and stir for a minute.
2.  Add in the Ginger, Garlic and Green Chilies and cook until the onions are brown, then turn off heat.
3.  In a blender, grind the browned onion mix, cilantro and mint.
4.  Heat the rest of the oil and add the black Cumin until they crackle.  Then add the cinnamon, bay leaf, cardamoms, and cloves, cook for 30 secs.
5.  Add in the turmeric the ground mixture.  Cook for a minute or so and add in the green peas, chili powder, and salt, adding water if needed.  Cover and cook until the peas are tender (approx 5-7 minutes).
6.  Add the drained and squeezed paneer.
7. Lower heat and add in the well-beaten yogurt and heavy cream.  Mix well.
8. Add in garam masala and water or whey as needed.  Cover and cook for 5 minutes.

Right: Muttar Paneer Curry

Print Friendly and PDF

Sunday, July 14, 2013

Khaman Dhokla

I hesitated before getting to work on my meal today.  I wanted to make dosas, samosas, coconut chutney, and tomato chutney.. as I started taking notes, I had a cerebral quantum leap to Mohinga.  Keep an eye out because it's still floating around in my head.  Then I imagined that some meat was going to be requested, and started looking at different curries... and then I went back to my natural state... Gujurat.  I am a Patel after all!
Khaman dhokla may seem like the same thing as Khatta dhokla to the unexperienced, but it really is different.  I thought it was just a color thing, but it is also a texture and taste thing.  Khatta is white and made from rice flour and urad dal with yogurt.  Khaman is yellow and made from chickpea flour without yogurt.  Khaman is fluffier, and slightly sweeter, which is probably why it is usually eaten at breakfast time in a Gujurati home.  I always do whatever I want so I eat it anytime.
Yield: 20-30 pieces
Ingredients:
200g Gits Khaman dhokla mix
260 mL water
2 Tbsp oil
Seasoning:
1 Tbsp oil
1 tsp mustard seeds
1 slit greed chili
handful chopped cilantro
1 tsp poppy seeds
handful dried coconut
Directions:
1.  Mix the khaman mix with the water and oil gently until lumps are gone.
2.  Rub some oil on a microwave safe tupperware and pour the batter in up to 1 inch height.
3.  Microwave uncovered for 4 minutes.
4.  Make the seasoning by heating oil in a wok.  Add the mustard seeds and chili until they start to crackle.
5.  Brush the seasoning onto the dhokla, then sprinkle some poppy seeds, coconut, and cilantro.
6.  Cut the dhokla into cubes.

I served this as a side while trying to recreate something I was served by my family in India:  Methi na Gota.  I horribly failed at the fenugreek fritters.  Mine look and taste nothing like what I was going for.. but you can't win every time.  I'll have to figure out a way to repurpose them as gatta (chickpea flour dumplings), because they're still edible, just not what I wanted.  They are dry and herby.  My khadi was delicious, though... maybe it's because I actually used real curry leaves this time.
Upper left: Khaman dhokla
Upper middle: Kadhi
Right: Bite of paneer in tomato sauce
Lower middle: Lobia curry with jeera rice
Lower right: My sorry failed attempt at Methi na Gota

Reaction #1 : What? no Naan?
Reaction #2 : How in the hell did you make this much of a mess in the kitchen without making Naan?

Some people are just never satisfied with what they have until they stop having it...

Print Friendly and PDF

Saturday, July 13, 2013

Pistachio Coconut Burfi

I'm not sure what's wrong with me.  What do most people do after coming home from a restaurant?  Watch some tv, read, shower, play a board game or surf the internet... Me? I make Burfi.  I'm not hungry, but I wanted to make pistachio coconut burfi.  I'm probably planning something very Indian for tomorrow like masala dosas and dhokla with chutney.  Maybe...
And if I change my mind and decide to do some szechuan chicken or lahmacuns (turkish pizza), there will always be burfi for dessert!
This burfi is almost exactly like my Coconut Burfi but with an addition of ground pistachios and added cardamom.  I think cardamom is one of the most intriguing spices, especially if you dry roast and grind the pods yourself.  The aroma released is so invading...but in a good way.
Ingredients: 
2 1/2 cups (240g) sifted chickpea flour
  5 Tbsp oil
3 Tbsp butter (75g)
  25g cup dried coconut
100g ground pistachios
  3 cardamom pods, roasted and ground
1 14 oz can sweetened condensed milk (397g)
Directions:
1.  In a deep pan, melt the butter and oil.  Stir in the chickpea flour a little at a time, as if you were making a roux.  Eventually the mixture will be more floury than liquidy.  That's what you want.
2.  Lower the heat and keep stirring, breaking up the lumps for 10 minutes, then stir in the pistachios and coconut and cook stirring for another 10 minutes until the flour is slightly colored an a nice nutty aroma is wafting through your home .
3.  Turn off heat, stir in the cardamom, then the condensed milk.
4.  When incorporated, quickly dump the mixture into a parchment paper lined baking dish.  Cover it all with more parchment paper and with a towel, press into a compact rectangular shape, 3/4 in thick. Let cool at least 20 minutes in the fridge before cutting into "pretty" diamond shapes.

These are delicious.  You can't really taste the pistachios, though.  I think I'm going to stick to the Coconut recipe, but its always nice to change things around every now and then.  Plus, the cardamom tastes great in these ones!

Print Friendly and PDF

Spice Hunting

There is nothing like a shopping spree to cheer a girl up.
You'd better not take me to the mall, though!

Ooo look at that sneaky little spy on the right hand side of the photo... That,  is the being on this earth that takes up the most space in my heart..and my bed.

I'm digressing.

I'm starting to run out of some key ingredients I brought back from India, and in parallel have not yet aquired all the necessary ingredients for my Burmese adventures.
Today I found things that brought a true smile to my face.
Coconut oil, kasoori methi (dried fenugreek leaves), small chickpeas, dosa mix, dried galangal, dried shrimp, toasted rice powder, szechuan pepper, garam masala....oooh!
I also learned that what I thought were curry leaves I brought back from India were actually just large bay leaves.  How could I have possibly made that mistake?
That's ok though, I rectified.  It might not completely fill the void I'm feeling these days, but it is enough to keep my mind busy with culinary matters.

Print Friendly and PDF

Thursday, July 11, 2013

Shallot Cabbage Refresher

Another simple but pleasant treasure from Burma. Naomi Duguid lists it in the "condiment" section of her book, which is definately not an error, but I see it also as a salad side-dish...not salad-meal.  She also appropriately calls it "refresher" which exactly describes the effect.
Tonight, I used it as a part of a Burmese Lettuce Wrap, but tomorrow it will be a side eaten with a fork, subliming whatever I happen to create.
Ingredients:
1 cup shredded cabbage
1 very large shallot, minced
Juice from one lemon
1 Tbsp rice vinegar
1 tsp nuac nam (fish sauce)
1 chili, minced (I used Thai)
1 Tbsp chopped cilantro
Directions:
1.  Place the shallots, chili, lemon juice, rice vinegar, and fish sauce in a salad bowl and let marinate at least 30 minutes so the shallots soften.
2.  When ready to eat, add the cabbage and cilantro and toss.

Flavor on every pleasure part of your brain...well, for now anyway.

Print Friendly and PDF

Burmese Sardine Wraps

I decided this was Burmese because of the 2 Burmese dishes I had as leftovers and the fried dried shallots I sprinkled on top of my mixture before wrapping it all up.
Looks like I slaved pretty hard on this one, doesn't it?  Well, since I used some leftovers, the longest part was cooking the bean thread noodles... about 5 minutes.
Here's what goes into my Romaine Lettuce leaves:
Grilled sardines rubbed with Sriracha and cilantro
Glass noodles (mung bean thread noodles)
Mint
Scallions
Cilantro
Fried dried scallops
some Hot Hot Chili
a little Eggplant Curry on one
a little Paneer in tomato sauce on another one
Fold it up like a taco, and eat with your hands, being sure to get it all over the place, but loving every second of it.
I let all the ingredients cool to room temperature and I think it's probably the best way to eat it.  Those glass noodles have a lovely texture and you can feel them properly when they're not piping hot.  My only regret is that I don't have any more noodles left to make this again tonight!

Print Friendly and PDF

Monday, July 8, 2013

Lobia (black-eyed peas) Curry

I'm kind of on a vegetarian streak.  I have no idea why, it's just happening this way.  I eat chicken or turkey or eggs every morning at breakfast, though.  I just appreciate all these vegetarian dishes and I've been making them all in a row so there is no space in my fridge for a meat dish.  We'll try to fix that tomorrow, ok?
My Burmese thali is transforming itself into an Indian thali tonight with my Lobia.  Black-eyed peas are very nutritious and not widely used in France.  In the US, it is a tradition to eat them on new year's day for good luck...probably because of all the good stuff they contain to start off the new year in a healthy way.  I've never cooked them before, so we'll see how this goes.
Adapted from Tickling Palates
Ingredients:
1 cup dried black-eyed peas, soaked overnight
2 chopped onions
1 chopped tomato
2 tsp garam masala
1 tsp mustard seeds
1/4 tsp asofetida (hing)
1/2 tsp turmeric
1 sprig curry leaves
2 Tbsp oil
chopped cilantro and lemon for garnishing
Paste:
1 onion, chopped coarsley
1 Tbsp oil
2 tsp chickpea flour (besan)
2 tsp coriander seeds
1 tsp fenugreek seeds
1 tsp cumin seeds
1 teaspoon nigella
2 dried chilis
4-5 tsp dried coconut
Directions:
 1.  Cook the lobia in the crockpot in a large amount of water.  Mine were very tender after 5 1/2 to 6 hours.  You can pressure cook them if you prefer.
2.  Make the paste by heating some oil in a wok.  Add the dried chilis and seeds and fry about 30 seconds.  There should be some sizzling.
3.  Add the chopped onion and stir, cooking until translucent, then add the coconut and chickpea flour and let toast.
4.  Off heat, grind the concoction together, adding some of the cooking water from the lobia.  Set aside.
5.  Make the curry by heating some oil in a wok.  Add the mustard seeds, tumeric, and hing.  When it starts to crackle, add the curry leaves, garam masala, and onions and cook until translucent.
6.  Add the tomato and cook until it integrates.
7.  Add the paste and heat through.
8.  Add the cooked lobia with some of the cooking water.  Bring to a boil, then simmer 10 minutes so the flavors infuse.  I added all the cooking water because I like it saucy.  The coconut makes a thick curry.  Taste and add salt if necessary.  Mine was quite spicy...just the way I like it.

Serve garnished with chopped cilantro and some lemon.  It goes well with rice or alone, or in a thali.
Middle: Jeera Rice
Bottom: Ungarnished Lobia Curry

There really is no way to describe the euphoria you get from eating quality Indian food.

Print Friendly and PDF

Sunday, July 7, 2013

Burmese Paneer in Tomato Sauce

You were about to ask:  where's the protein? weren't you?
I have to admit I was a little reluctant to trying a recipe using paneer that was anything else but Indian.  It's not that I didn't think it would be good, but because I wasn't sure I wanted to use up my paneer in non Indian food.
Burma is close enough to India to let me make this one exception..and I'm happy I did.  I have to say this dish was the star of my meal.  It's definately NOT a waste of paneer.  It has lots of depth and an extremely pleasant texture.  It could easily integrate an Indian thali as well, which gives it the winning points.
Burma:  Rivers of Flavor p. 124
Ingredients:
1/4 cup peanut oil (I used sesame + sunflower)
1/2 tsp turmeric
1 large shallot, coarsely chopped
2 Tbsp grated garlic
2 tsp chili powder
2 tsp shrimp paste (I used brown miso)
2 cups blended tomatoes (tomato puree)
4 green chilis, slit (I used 2 thai chilis)
1 lb cubed paneer (I used yield from 2L raw milk ~ 400g)
1 cup minced scallions
1 cup chopped cilantro
Directions:
 1.  Heat the oil in a large wok.  Fizz the turmeric, then add the shallots.  Cook about 4 minutes or until the shallots soften.
2.  Add the garlic, chili powder, and miso and stir a few secondes until the garlic cooks.
3.  Add the blended tomatoes.  To get 2 cups I used 1 can + 2 fresh tomatoes.  The thicker the better.  Bring to a boil, then simmer uncovered for 10 minutes.
4.  Add the green chilis and the paneer and simmer for another 10 minutes.  Taste and adjust the seasoning.  Add salt if you need to.  It should have depth and shouldn't taste like raw tomato.
5.  Stir in most of the cilantro and scallions, keeping some aside for garnishing.

This is best enjoyed with roti or nan, but since I haven't gotten that far today yet, I ate it with my hands and a spoon, and it was perfect.  Not too spicy, not too tomato-y.  Just perfect.

Needless to say I got yelled at during the whole meal creation because I made a mess in the kitchen.  Guess who wasn't allowed to have any paneer?
To all you OCD people who do not cook.  Chill out!  You can't paint the Sisteen Chapel without getting a little paint on your overalls.  

Print Friendly and PDF

Sweet Corn Soup

I don't know why I decided to make soup with the heat we are having.  It might be in my genes.  In India, it is always hot and there is always some kind of soup served at mealtimes.  This month, I'll be recreating the thali concept with my meals.  It's not going to be 1 main course anymore, but several different dishes with different flavors I'll be able to pick at throughout the meal and enjoy.  This soup happens to be part of that concept.  It is meant to sip on during a meal, not to be the main event.
This one is from ShowMetheCurry.
Ingredients:
Oil – 1 Tbsp
Garlic – 1 tsp (finely minced)
Ginger – 1 tsp (grated)
Onion – 1 small (finely chopped)
Frozen Peas – 1/2 cup
Carrots - 1 chopped
Fresh Green Beans – 1/4 cup (cut)
Cauliflower – 1/2 cp (chopped finely)
Celery – 1/4 cup (chopped finely)
Cream Style Corn – 1 can
1 slit thai chili
Salt – to taste
Black Pepper – to taste
Water – 1/2 cup
Vegetable Broth – 2 cups or more as needed
Corn flour – 2 tsp (mixed with a little water)
Sugar – 1 tsp (optional)
Green Onions – 2 (chopped, for garnishing)
Directions:
 1.  Make soup.  Do I need to go into details?  Heat the oil, color the onions, throw in all the other veggies.  When you're ready, add the broth bring to a boil and let simmer until everything is cooked (while you make the other parts of the meal).
2.  To thicken, mix some corn flour with some water and stir in.

Garnish with green onions
Easy and delicious.

Print Friendly and PDF

Traveler's Eggplant Curry

There is something about eggplant that makes it almost mysterious.  The color.  That deep purple, shiny and sexy that calls you to it.  Come to me, take me home.
The texture.  When raw it is firm and beige.  It behaves like an apple and oxydizes quickly, so you have to have a plan before opening it up.  While cooking it is like a sponge, absorbing any flavor you coat it with.  Once cooked, it becomes creamy, but not shapeless.  The skin left on gives it texture and it will give with just a small amount of bite pressure, releasing all the flavor it absorbed on its journey from the farm to your mouth.
For all these reasons, when I find them on sale and stumble across a recipe making eggplant its star, I don't need to think twice.
This one is from Burma: p. 104.
I adapted it to make it vegan (but the real reason is that I didn't have any anchovies or shrimp paste).  If I did have anchovies, I would have eaten them before being able to use them in a recipe, so it was futile to even think I would use anchovies.
Ingredients:
3 Tbsp peanut oil (I used sesame)
1/8 tsp turmeric
1 large minced shallot
 1 Tbsp ginger
1 Tbsp sesame seeds
1 large tomato, minced
1 lb cubed eggplant (about 2 or 3 medium)
1 cup water
3 tbsp anchovies (sub brown miso)
1 tsp red chili oil (I used red chili paste)
Directions:
 1.  In a large wok, heat the oil and add the turmeric.   It should fizz.
2.  Add the shallots and cook until soft, about 4 minutes.
3.  Add the ginger, miso, and tomato and cook a few minutes until the tomato disintegrates.
4.  Add the eggplant and sesame seeds and stir until all the pieces are evenly coated.
5.  Add the water and chili oil, bring to a boil, then simmer for about 30 minutes or until eggplant is fully cooked.  Taste and add salt if needed.  I didn't think it needed any.

This is my first time using miso.  As the book explains, it is a Umami ingredient.  Something used to give a meaty or earthy taste.  Miso and toasted chickpea flour are the vegetarian options for umami.  The non veg versions are shrimp paste, anchovy paste, or fish sauce.
I love learning this type of thing.

This dish was part of a trio, which will be alternating all week, for as I run out of one dish, another will replace it.
Top:  Paneer in Tomato Sauce
Middle: Sweet Corn Soup
Bottom:  Traveler's Eggplant Curry

Print Friendly and PDF

Wednesday, July 3, 2013

Falafel

Why do I crave such things?  I've been thinking about doing this for a few days.   Why don't I just do it? Or buy ready made falafel mix?
Because I want GOOD falafel.. and I want it in a pita or on some bulgur so I can eat it with my hands.. and I want it alongside some yogurt tahini sauce with shredded cabbage and cucumbers...and I want it to be my Friday night concert meal do I don't have to buy a flimsy sandwich once I'm there.
Did I mention I'm seeing Johnny Winter, Ben Harper, and Robert Cray?
So during my research, I stumbled upon a blog entirely dedicated to the Hummus by an Israeli blogger.  My recipe is adapted from theirs.
So making falafel from scratch is quite easy... mine turned out crispy on the outside and tender and warm on the inside..hmm reminds me of something.
Yield 25-30 falafel depending on the size of your hands...
Ingredients:
2 cups dried chickpeas, soaked at least 12 hours
5 large cloves garlic
1/2 large red onion or 1 small
1/2 cup chopped parsley
1/2 cup chopped cilantro
2 Tbsp sesame seeds
2 Tbsp za'atar
1 tsp cumin
1 tsp paprika
salt + fresh cracked pepper
2 tsp baking soda
oil for deep frying
Directions:
1.  Wash the soaked chickpeas well, then peel the skins off.  Seriously, it takes forever, but your insides will thank you.  Mix in a food processor with the garlic and onion.  Add a bit of water if too dry to blend.
2.  Stir everything else but the baking soda.  Knead a bit and let rest for 30 minutes.  You can heat the oil while you wait.. or make the salad or bulgur or tahini yogurt sauce...whatever.
3.  Taste and add adjust the seasoning.  Knead in the baking soda, and make apricot sized balls with your hands.  I have small hands...so they are small apricots.
3.  Make sure the oil is hot, but not boiling.  Drop the balls in the oil and cook until nice and golden brown.. about 3 minutes.
4.  Remove onto paper towels.

Serve warm or at room temperature with some tahini yogurt sauce in a pita or over bulgur...
I've never had better falafel in my life.  This hit the spot.
Nobody noticed the vegetarianism of this meal...and I still haven't leaked the secret.  I was even asked to make this for company.
I win again!

So as I was in line for my concert, I was equally excited about eating my falafel sandwich as I was about seeing Ben Harper!  My sandwich was the sexiest one there and yes I'm proud of that.

*if you have fragile intestines, it would be best to take the skins off the chickpeas before grinding them.  I had no issues, but some people do.

Print Friendly and PDF